[Oracle] Oracle 19c + CentOS7 설치(GUI)
- Databases/Oracle
- 2021. 1. 27.
오라클을 설치할때는 2가지 방법이 있습니다. GUI에서 설치하는 방법과 백그라운드에서 설치되는 사일런트(Silent) 설치방법이 있습니다.
여기에서는 GUI로 설치하는 방법을 알아봅니다.
■ 오라클 다운로드
먼저 오라클 홈페이지에서 Oracle 19c를 다운로드 받습니다.
https://www.oracle.com/database/technologies/oracle-database-software-downloads.html#19c
섹션 : 19.3 - Enterprise Edition (also includes Standard Edition 2)
파일 : Linux x86-64
종류 : ZIP
■ OS설정
• 호스트 네임 등록
/etc/hosts에 반드시 호스트이름 및 IP를 등록합니다.
shell> ifconfig -a
eth0: flags=4163<UP,BROADCAST,RUNNING,MULTICAST> mtu 1500
inet 10.10.10.110 netmask 255.255.255.0 broadcast 10.30.224.255
inet6 fdb2:2c26:f4e4:0:ebdf:5218:4dda:fe58 prefixlen 64 scopeid 0x0<global>
inet6 fe80::a48e:a24c:6dcb:a93b prefixlen 64 scopeid 0x20<link>
inet6 fe80::7181:ed8a:bd9:a640 prefixlen 64 scopeid 0x20<link>
ether 00:1c:42:d7:dd:51 txqueuelen 1000 (Ethernet)
RX packets 12289 bytes 10143349 (9.6 MiB)
RX errors 0 dropped 0 overruns 0 frame 0
TX packets 6253 bytes 3895390 (3.7 MiB)
TX errors 0 dropped 0 overruns 0 carrier 0 collisions 0
......
shell> vi /etc/hosts
127.0.0.1 localhost localhost.localdomain localhost4 localhost4.localdomain4
::1 localhost localhost.localdomain localhost6 localhost6.localdomain6
10.30.224.100 ora01
• selinux permissive 설정
shell> vi /etc/selinux/config
SELINUX=permissive
■ 설치 환경 구성
오라클에서 자동으로 OS 설치 환경을 셋팅해주는 RPM을 제공하고 있습니다. 이전에는 하나하나 수동으로 설정을해주어야 했는데 이것을 설치하면 필수 패키지 설치 및 OS 커널파라미터와 자원 제한 설정을 자동으로 수정 및 추가를 합니다.
자동환경 설정을 해는주는 패키지 주소는 다음과 같습니다.(CentOS, RHEL 기준입니다.)
shell> yum install https://yum.oracle.com/repo/OracleLinux/OL7/latest/x86_64/getPackage/oracle-database-preinstall-19c-1.0-1.el7.x86_64.rpm
터미널에서 yes/no를 물어볼시 y를 입력합니다.
※ 수동설치
인터넷이 안되는 환경, 혹은 수동으로 패키지를 설치할때 다음 패키지들을 설치.(모두 yum으로 설치.)
| bc binutils compat-libcap1 compat-libstdc++ elfutils-libelf elfutils-libelf-devel fontconfig-devel glibc glibc-devel ksh libaio libaio-devel libXrender libXrender-devel libX11 libXau libXi libXtst libgcc libstdc++ libstdc++-devel libxcb make net-tools nfs-utils python python-configshell python-rtslib python-six targetcli smartmontools sysstat |
▶︎ 자동, 수동 추가 Group 및 User
• 자동 추가 group
- Group명 : oinstall, dba, oper, backupdba, dgdba, kmdba, racdba
- 확인방법
shell> cat /etc/group
oinstall:x:54321:
dba:x:54322:
oper:x:54323:
backupdba:x:54324:
dgdba:x:54325:
kmdba:x:54326:
racdba:x:54330:
위의 숫자는 시스템마다 틀릴 수 있습니다.
• 수동그룹추가
shell> groupadd asmdba
• 자동 추가 user
- 유저명 : oracle
- 확인방법
shell> cat /etc/passwd
oracle:x:54321:54321::/home/oracle:/bin/bash
위의 숫자는 시스템마다 틀릴 수 있습니다.
▶︎ 자동 커널 파라미터 추가
다음과 같은 파라미터들이 추가가 되었는지 확인합니다.
shell> cat /etc/sysctl.conf
# sysctl settings are defined through files in
# /usr/lib/sysctl.d/, /run/sysctl.d/, and /etc/sysctl.d/.
#
# Vendors settings live in /usr/lib/sysctl.d/.
# To override a whole file, create a new file with the same in
# /etc/sysctl.d/ and put new settings there. To override
# only specific settings, add a file with a lexically later
# name in /etc/sysctl.d/ and put new settings there.
#
# For more information, see sysctl.conf(5) and sysctl.d(5).
# oracle-database-preinstall-19c setting for fs.file-max is 6815744
fs.file-max = 6815744
# oracle-database-preinstall-19c setting for kernel.sem is '250 32000 100 128'
kernel.sem = 250 32000 100 128
# oracle-database-preinstall-19c setting for kernel.shmmni is 4096
kernel.shmmni = 4096
# oracle-database-preinstall-19c setting for kernel.shmall is 1073741824 on x86_64
kernel.shmall = 1073741824
# oracle-database-preinstall-19c setting for kernel.shmmax is 4398046511104 on x86_64
kernel.shmmax = 4398046511104
# oracle-database-preinstall-19c setting for kernel.panic_on_oops is 1 per Orabug 19212317
kernel.panic_on_oops = 1
# oracle-database-preinstall-19c setting for net.core.rmem_default is 262144
net.core.rmem_default = 262144
# oracle-database-preinstall-19c setting for net.core.rmem_max is 4194304
net.core.rmem_max = 4194304
# oracle-database-preinstall-19c setting for net.core.wmem_default is 262144
net.core.wmem_default = 262144
# oracle-database-preinstall-19c setting for net.core.wmem_max is 1048576
net.core.wmem_max = 1048576
# oracle-database-preinstall-19c setting for net.ipv4.conf.all.rp_filter is 2
net.ipv4.conf.all.rp_filter = 2
# oracle-database-preinstall-19c setting for net.ipv4.conf.default.rp_filter is 2
net.ipv4.conf.default.rp_filter = 2
# oracle-database-preinstall-19c setting for fs.aio-max-nr is 1048576
fs.aio-max-nr = 1048576
# oracle-database-preinstall-19c setting for net.ipv4.ip_local_port_range is 9000 65500
net.ipv4.ip_local_port_range = 9000 65500
▶︎ 자동 자원 제한 관련 설정
다음과 같은 설정들이 추가가 되었는지 확인합니다.
shell> cat /etc/security/limit.d/oracle-database-preinstall-19c.conf
# oracle-database-preinstall-19c setting for nofile soft limit is 1024
oracle soft nofile 1024
# oracle-database-preinstall-19c setting for nofile hard limit is 65536
oracle hard nofile 65536
# oracle-database-preinstall-19c setting for nproc soft limit is 16384
# refer orabug15971421 for more info.
oracle soft nproc 16384
# oracle-database-preinstall-19c setting for nproc hard limit is 16384
oracle hard nproc 16384
# oracle-database-preinstall-19c setting for stack soft limit is 10240KB
oracle soft stack 10240
# oracle-database-preinstall-19c setting for stack hard limit is 32768KB
oracle hard stack 32768
# oracle-database-preinstall-19c setting for memlock hard limit is maximum of 128GB on x86_64 or 3GB on x86 OR 90 % of RAM
oracle hard memlock 134217728
# oracle-database-preinstall-19c setting for memlock soft limit is maximum of 128GB on x86_64 or 3GB on x86 OR 90% of RAM
oracle soft memlock 134217728
# oracle-database-preinstall-19c setting for data soft limit is 'unlimited'
oracle soft data unlimited
# oracle-database-preinstall-19c setting for data hard limit is 'unlimited'
oracle hard data unlimited
▶︎ 오라클 계정 추가 그룹 지정
오라클 환경설정 RPM을 설치 후 다음 명령어로 oracle 계정에 대해 모두 추가가 되도록 설정합니다.
usermod -g oinstall -G dba,oper,backupdba,dgdba,kmdba,asmdba,racdba oracle
▶︎ 수동 패키지 설치
수동으로 패키지 하나를 설치합니다. 거의 대부분 설치가 되지만 아래 하나만 설치가 되지 않는듯 합니다.
아래 패키지를 설치하지 않으면 데이터베이스 생성시 에러가 납니다.
shell> yum install gcc-c++
▶︎ 방화벽 해제
네트워크 인터페이스 이름은 시스템별로 틀릴 수 있습니다.
shell> firewall-cmd --get-active-zones
public
interfaces: eth0
shell> firewall-cmd --zone=public --add-port=1521/tcp --add-port=5500/tcp --add-port=5520/tcp --add-port=3938/tcp --permanent
success
shell> firewall-cmd --reload
success
shell> firewall-cmd --list-ports
1521/tcp 5500/tcp 5520/tcp 3938/tcp
▶︎ 오라클 계정 환경설정
• 오라클 소프트웨어 db설치 디렉토리로 이동
shell> mkdir -p /u01/app/oracle/product/19.0.0/dbhome_1
shell> mv LINUX.X64_193000_db_home.zip /u01/app/oracle/product/19.0.0/dbhome_1
• 소유권을 변경
shell> chown -R oracle:oinstall /u01
• 계정 환경 설정
shell> su - oracle
shell> vi .bash_profile
export TMP=/tmp
export TMPDIR=$TMP
export ORACLE_HOSTNAME=ora01
export ORACLE_UNQNAME=oracle19
export ORACLE_BASE=/u01/app/oracle
export ORACLE_HOME=$ORACLE_BASE/product/19.0.0/dbhome_1
export ORA_INVENTORY=/u01/app/oraInventory
export ORACLE_SID=ORCL
export DATA_DIR=/u01/app/oradata
export PATH=$ORACLE_HOME/bin:$PATH
export LD_LIBRARY_PATH=$ORACLE_HOME/lib:/lib:/usr/lib
export CLASSPATH=$ORACLE_HOME/jlib:$ORACLE_HOME/rdbms/jlib
export NLS_LANG=KOREAN_KOREA.AL32UTF8
• 압축 해제
unzip LINUX.X64_193000_db_home.zip
• 소프트웨어 설치 명령 실행
shell> ./runInstaller.sh
■ Oracle Software 설치
먼저 오라클 DBMS를 설치 후 Database는 나중에 생성합니다.
• DBMS 소프트웨어 설치
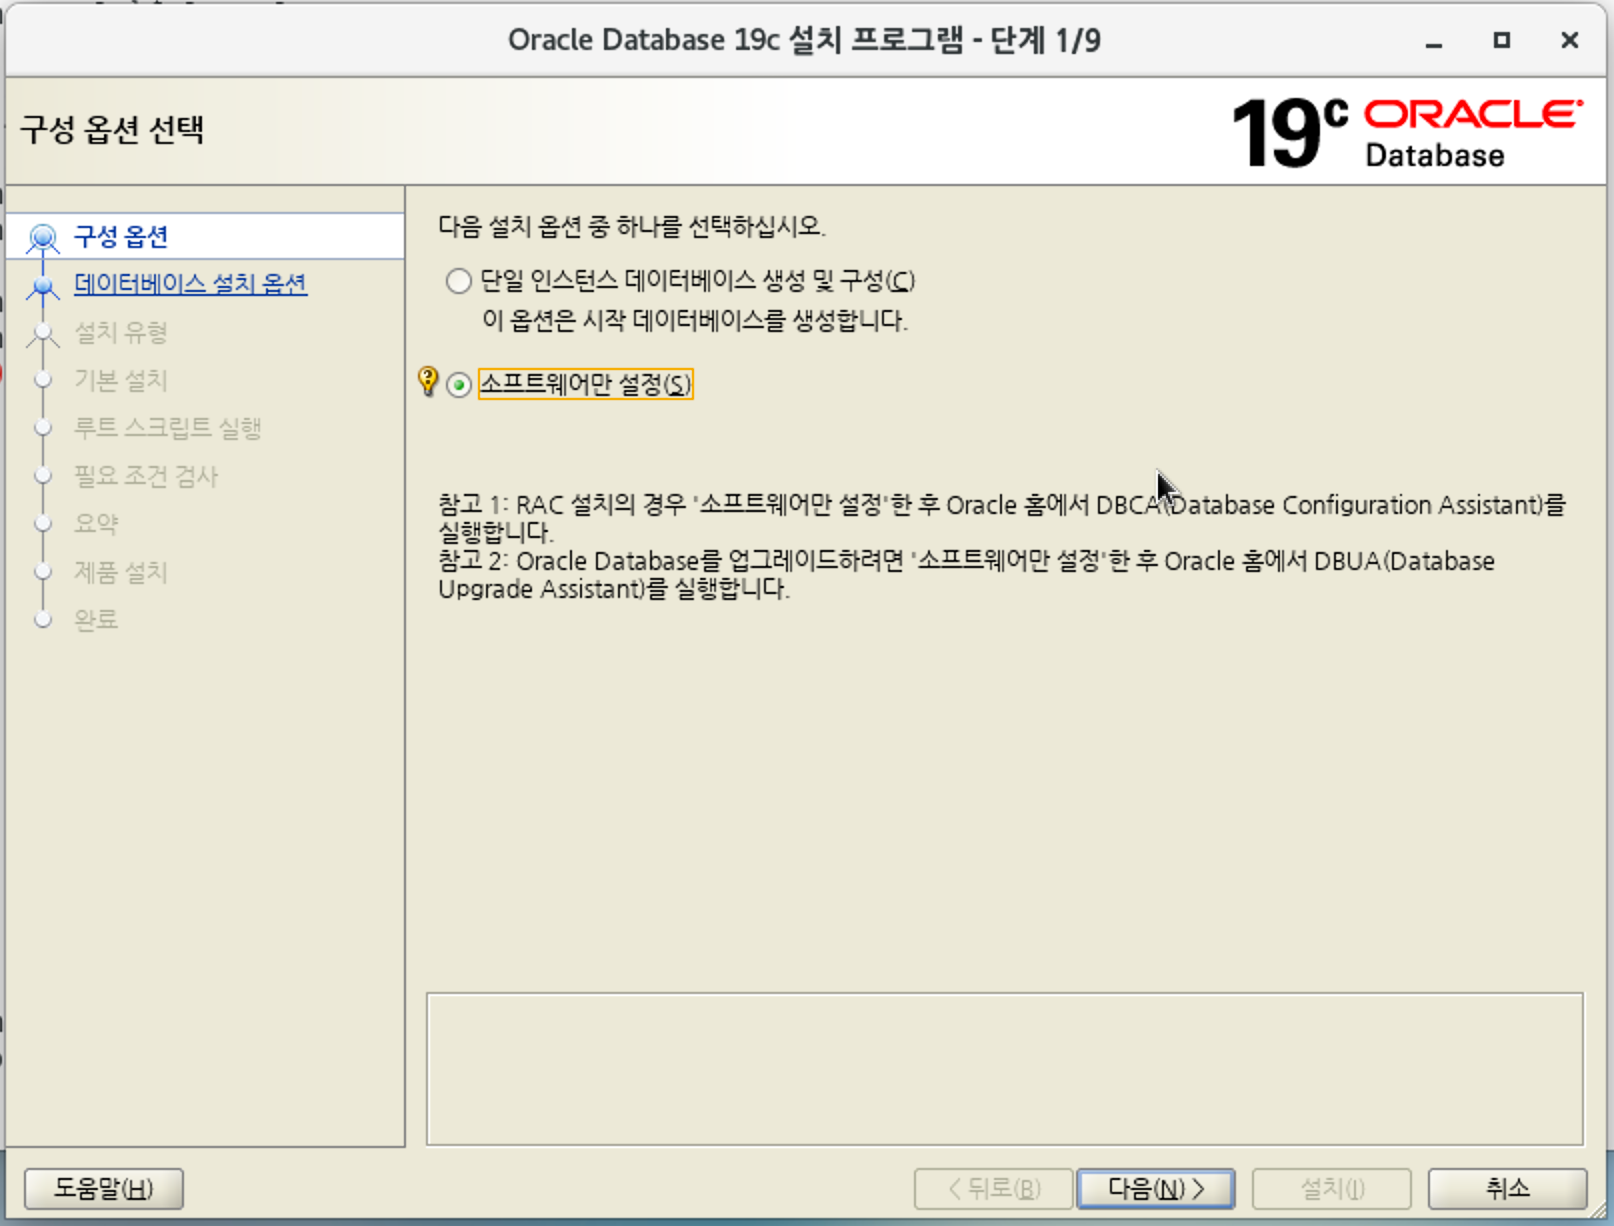
- 소프트웨어 설치 : "소프트웨어만 설정" 을 선택합니다.
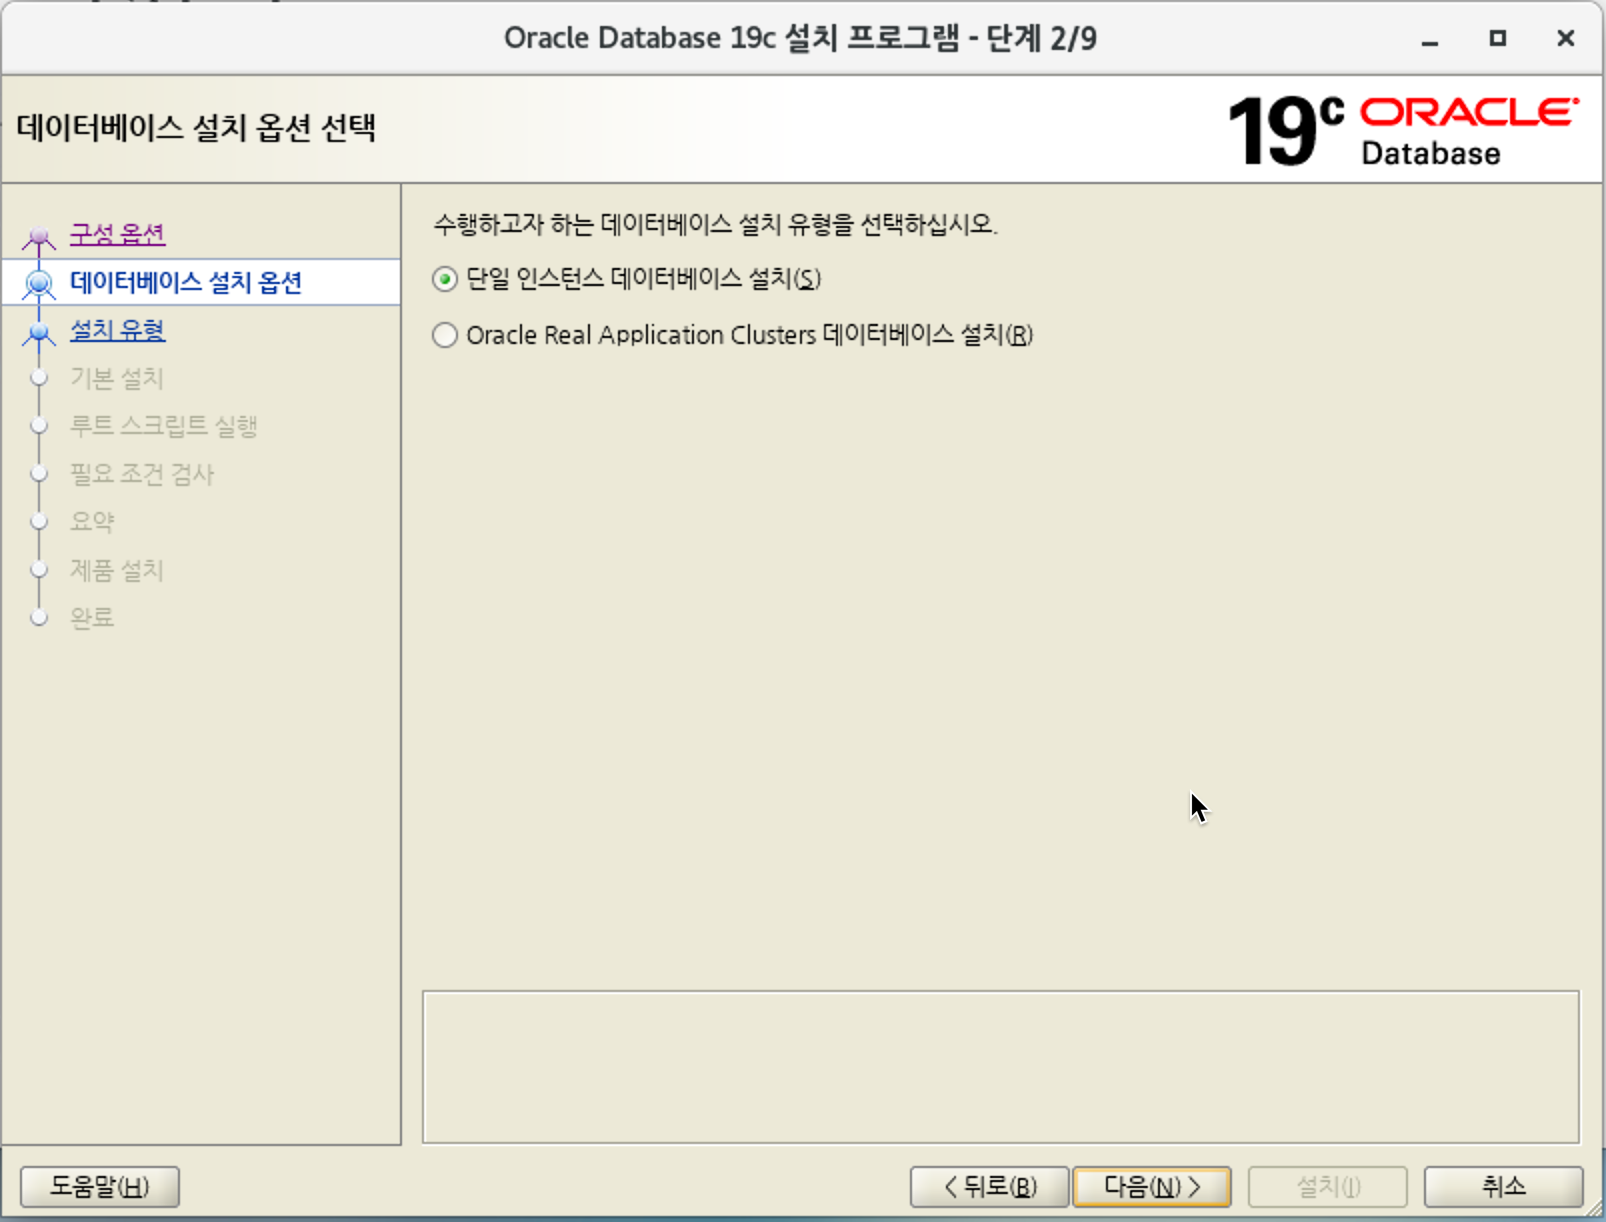
- "단일 인스턴스 데이터베이스 설치" 선택
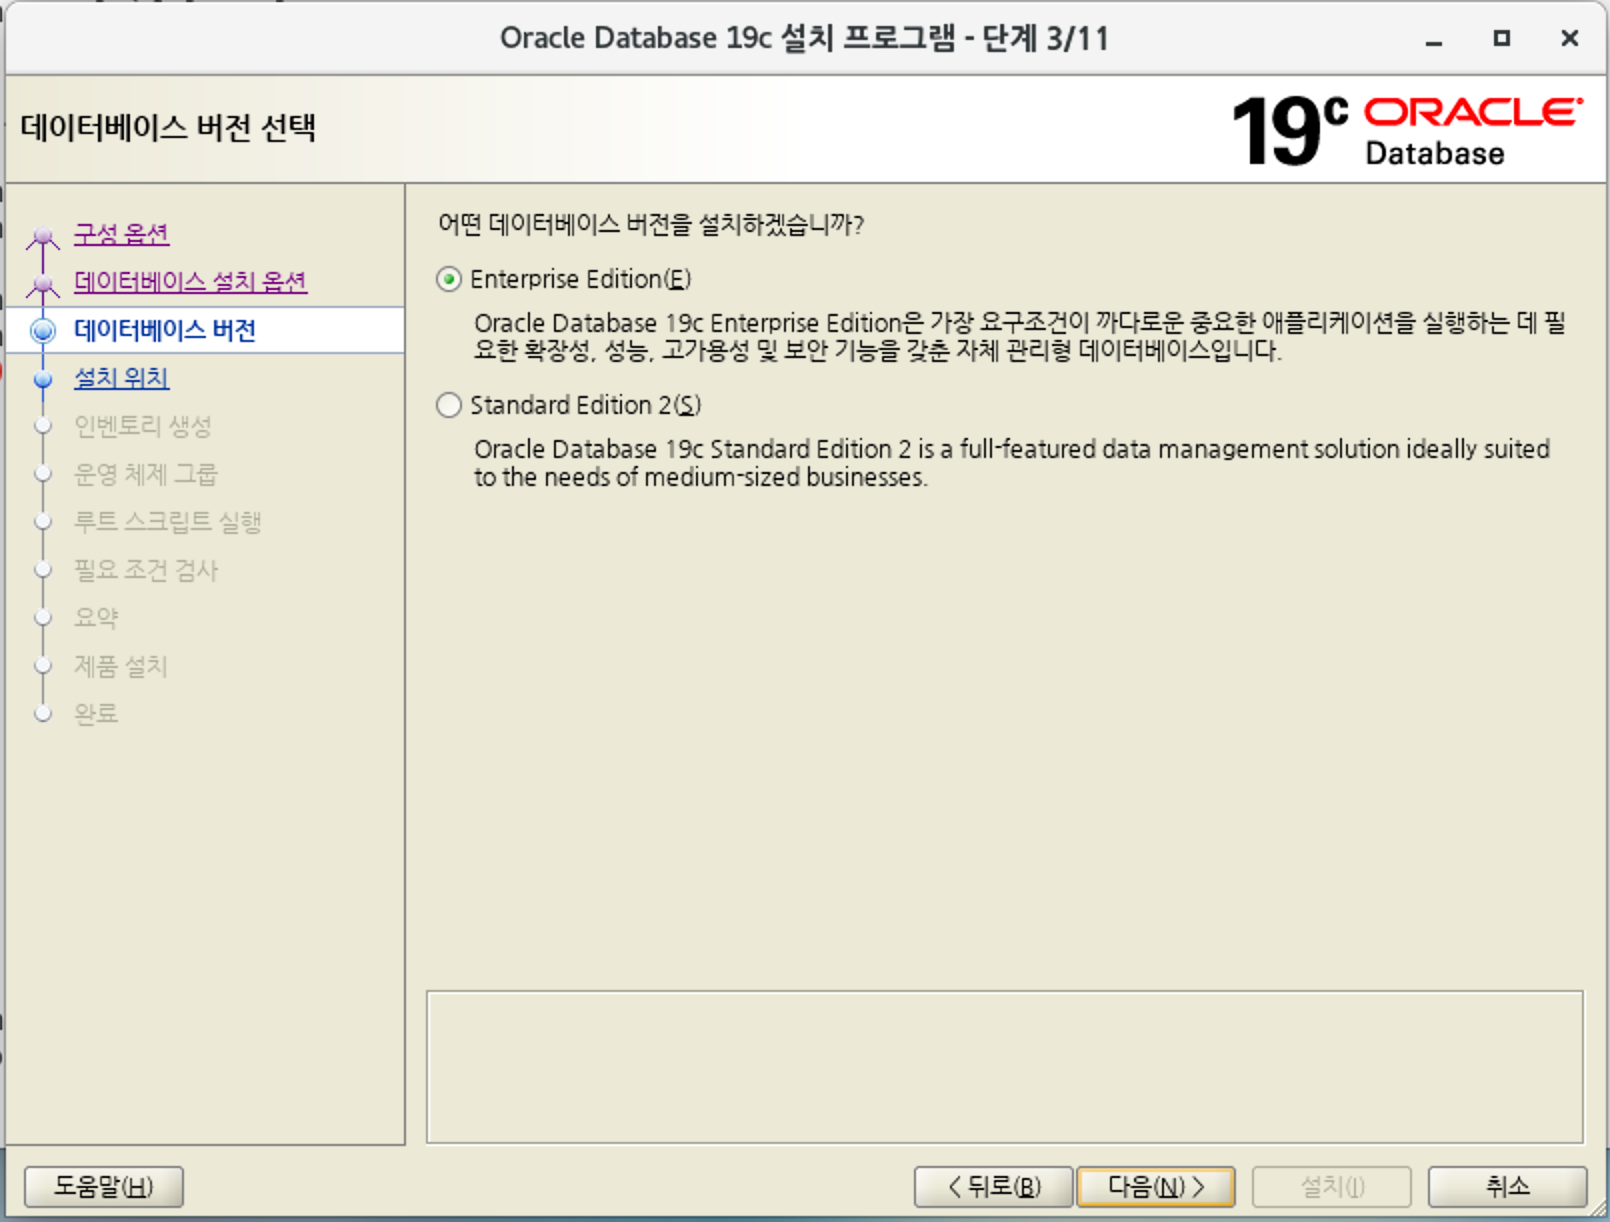
- "Enterprise Edition" 을 선택
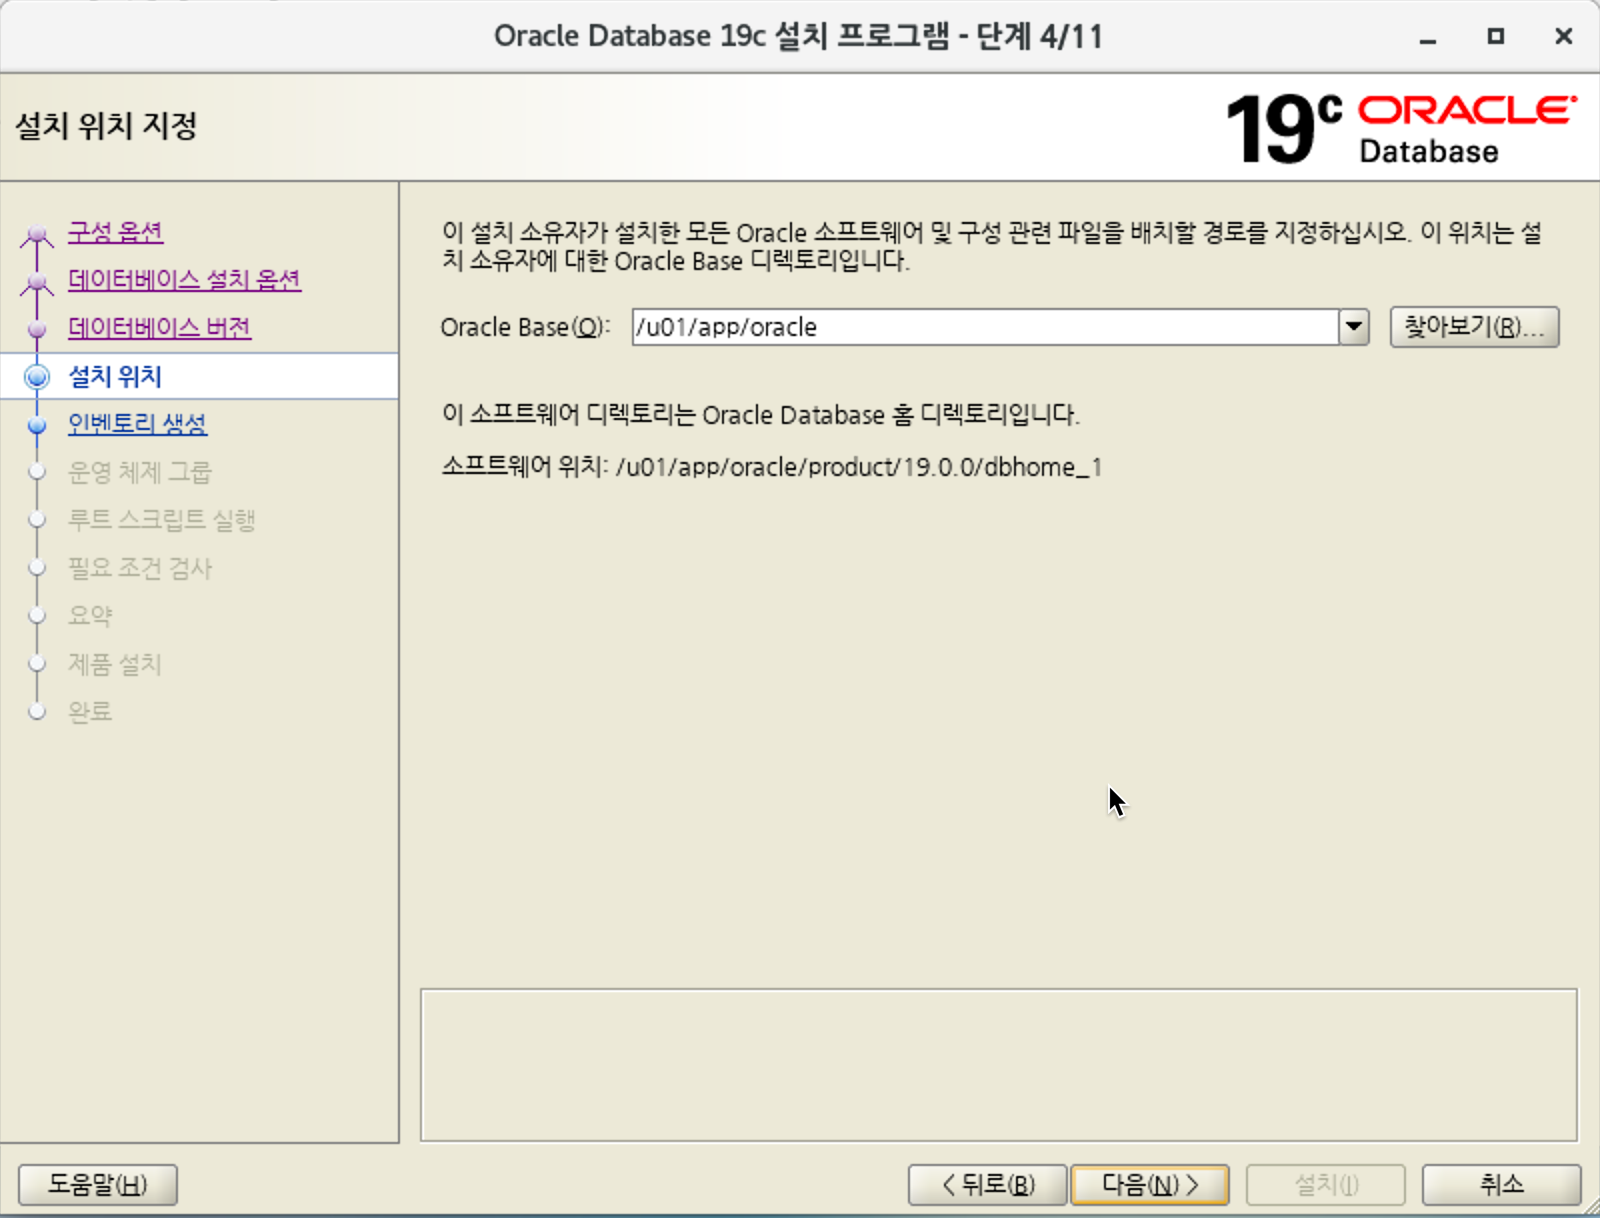
- Oracle Base 디렉토리가 기본적으로 입력됨.
- oraInventory 디렉토리 설정. 아래 위치에 설치합니다.
/u01/app/oraInventory
그리고 oraInventory 그룹은 oinstall로 선택합니다.
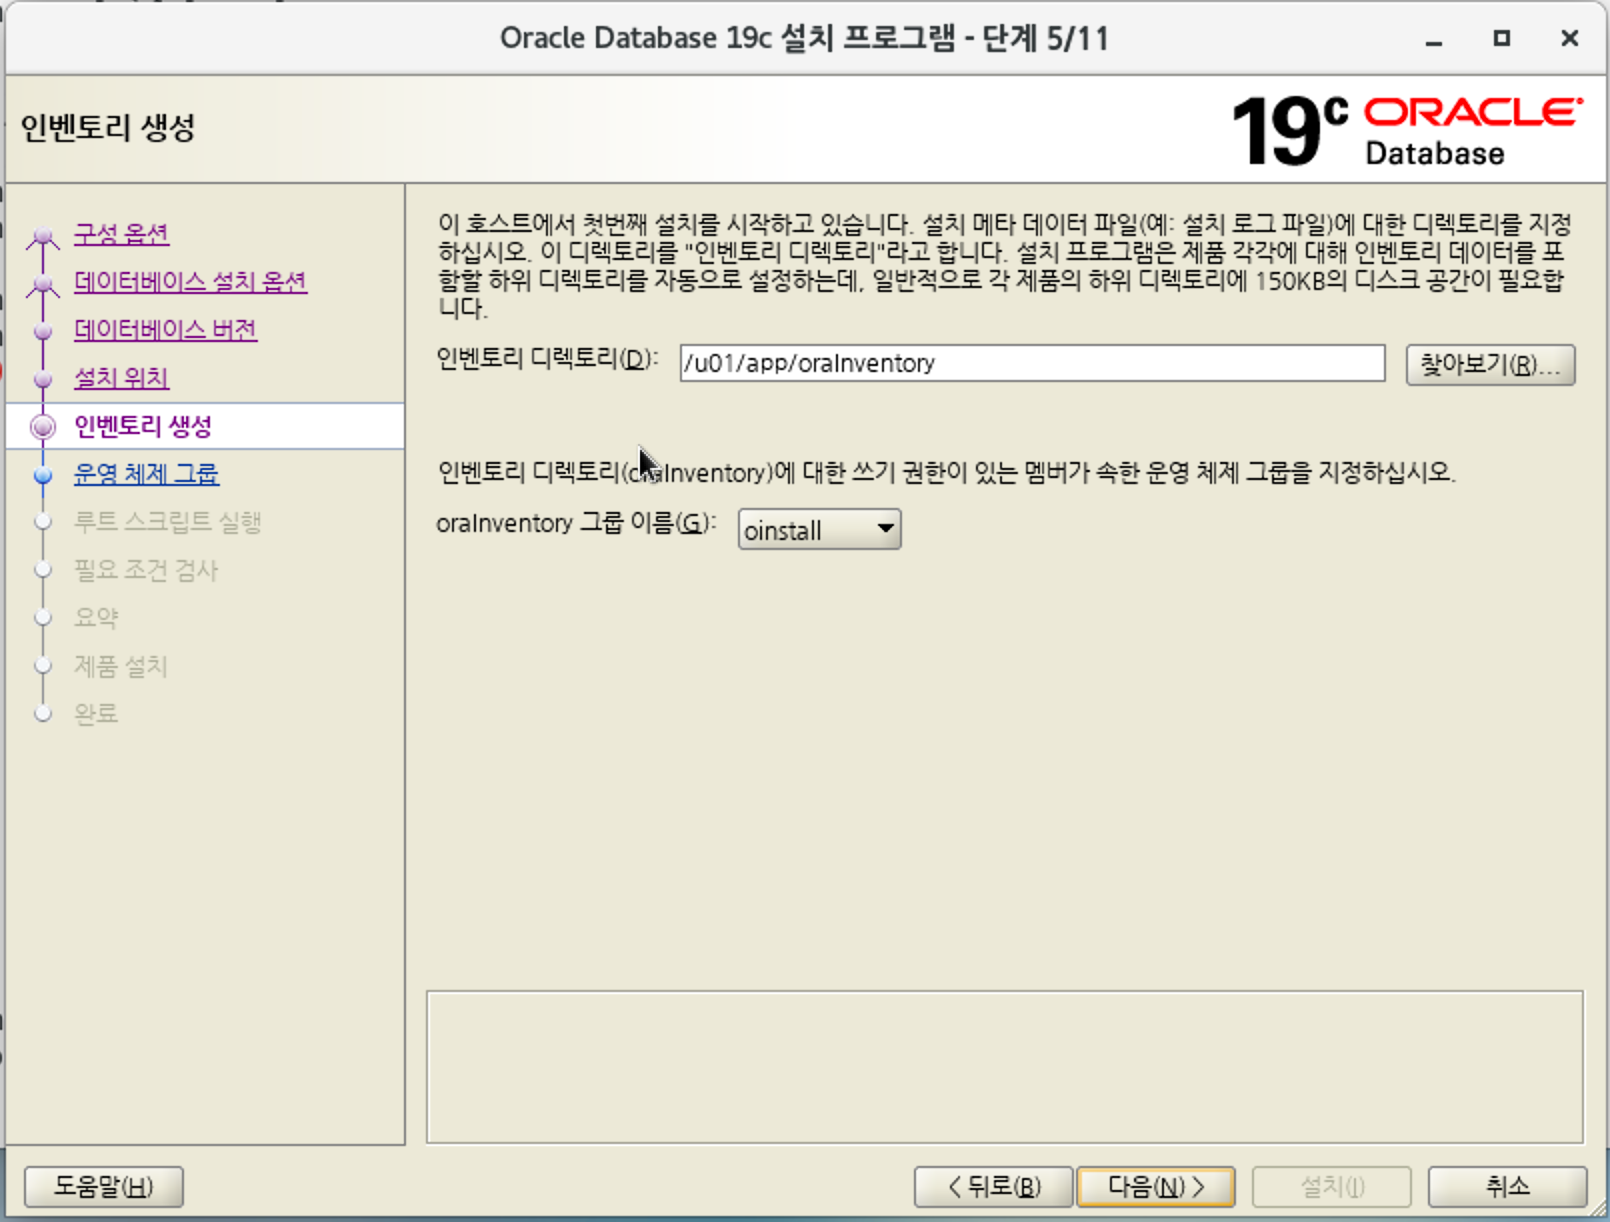
- 그룹명을 선택.
아래와 같이 각 그룹명이 자동으로 할당되는데 모두 dba로 변경합니다.
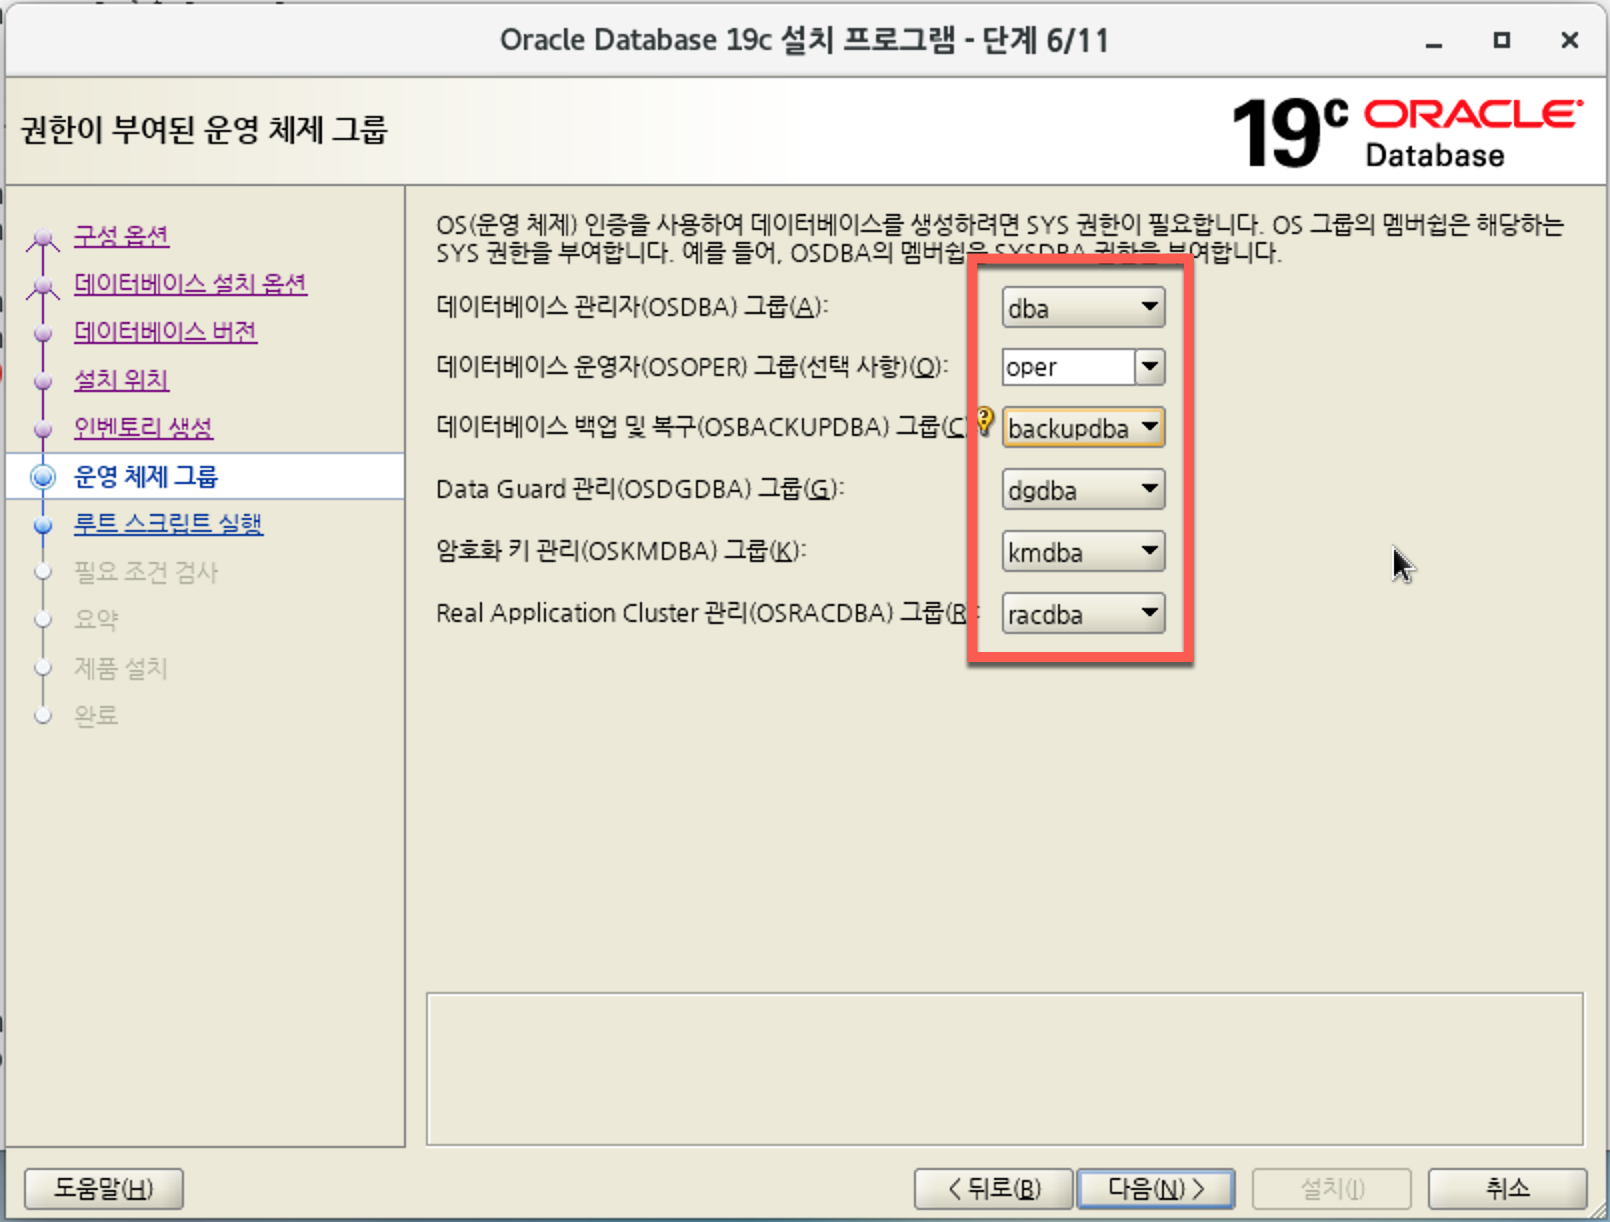
dba로 변경.

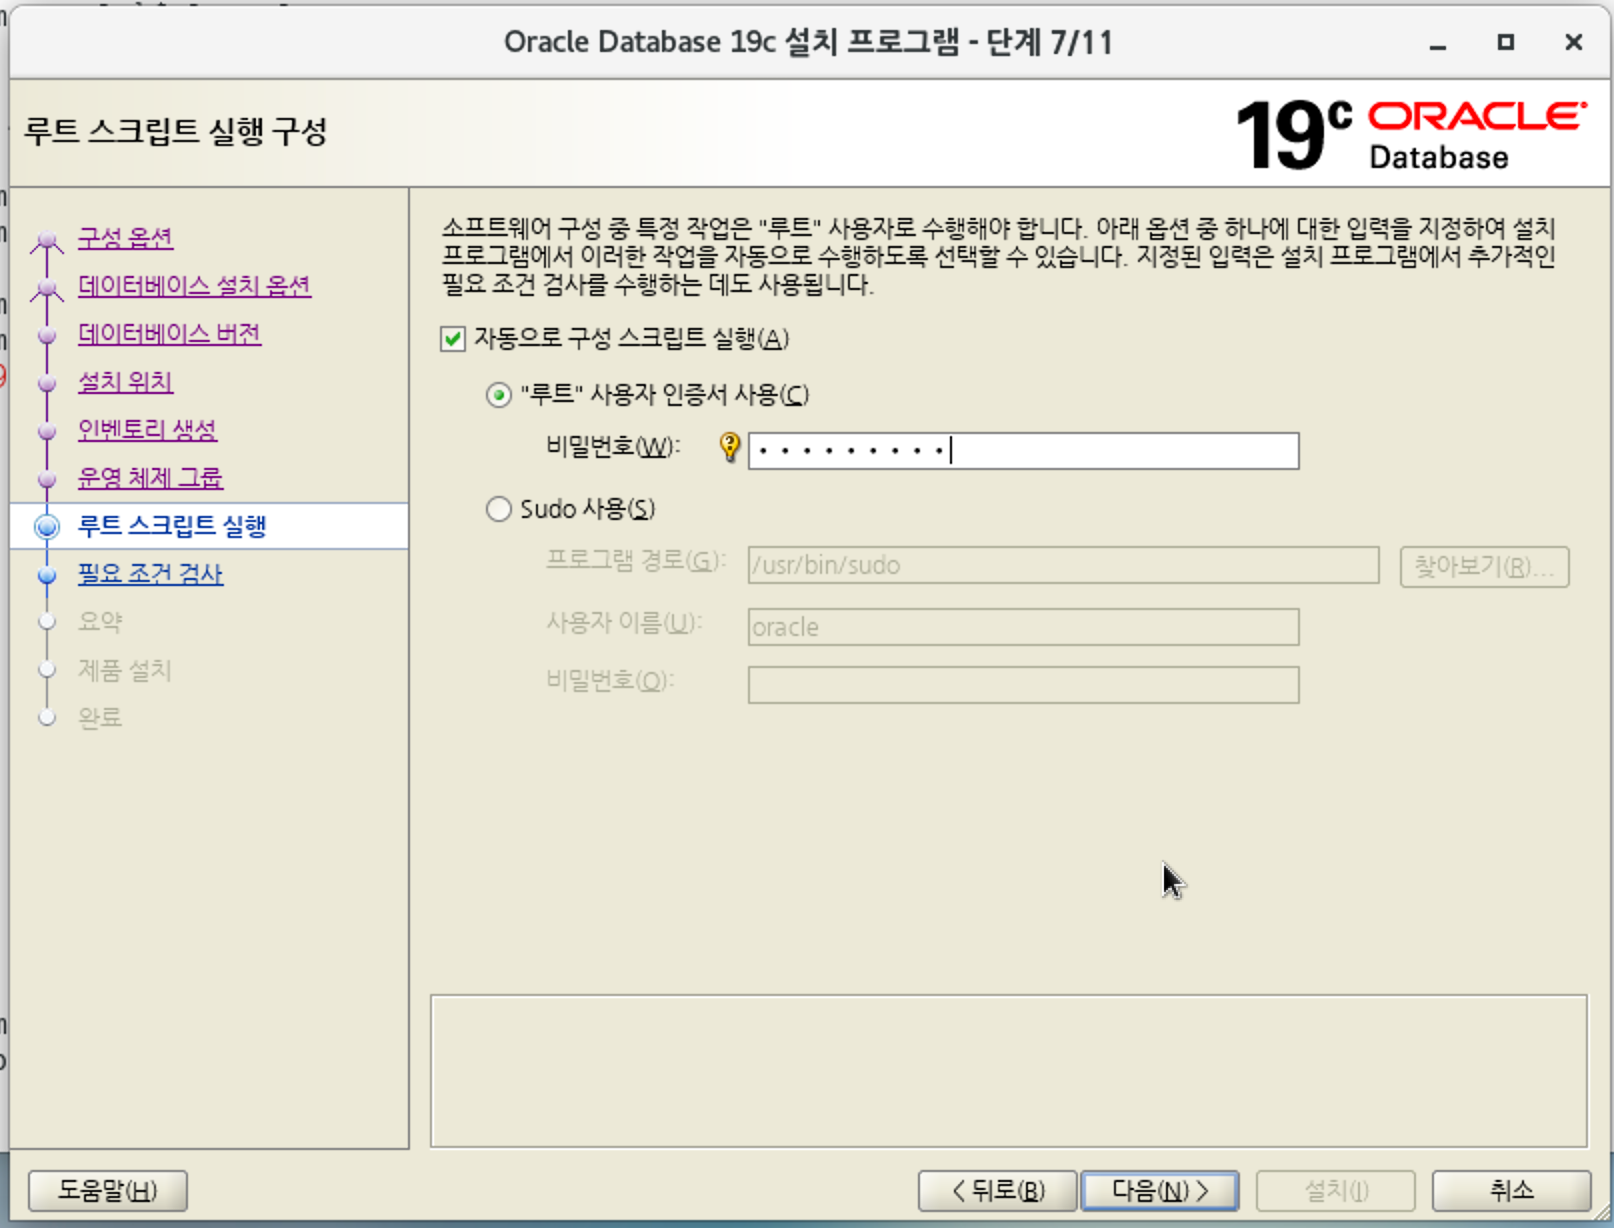
- 시스템 root 암호를 입력합니다. 정확하게 입력해야 합니다.
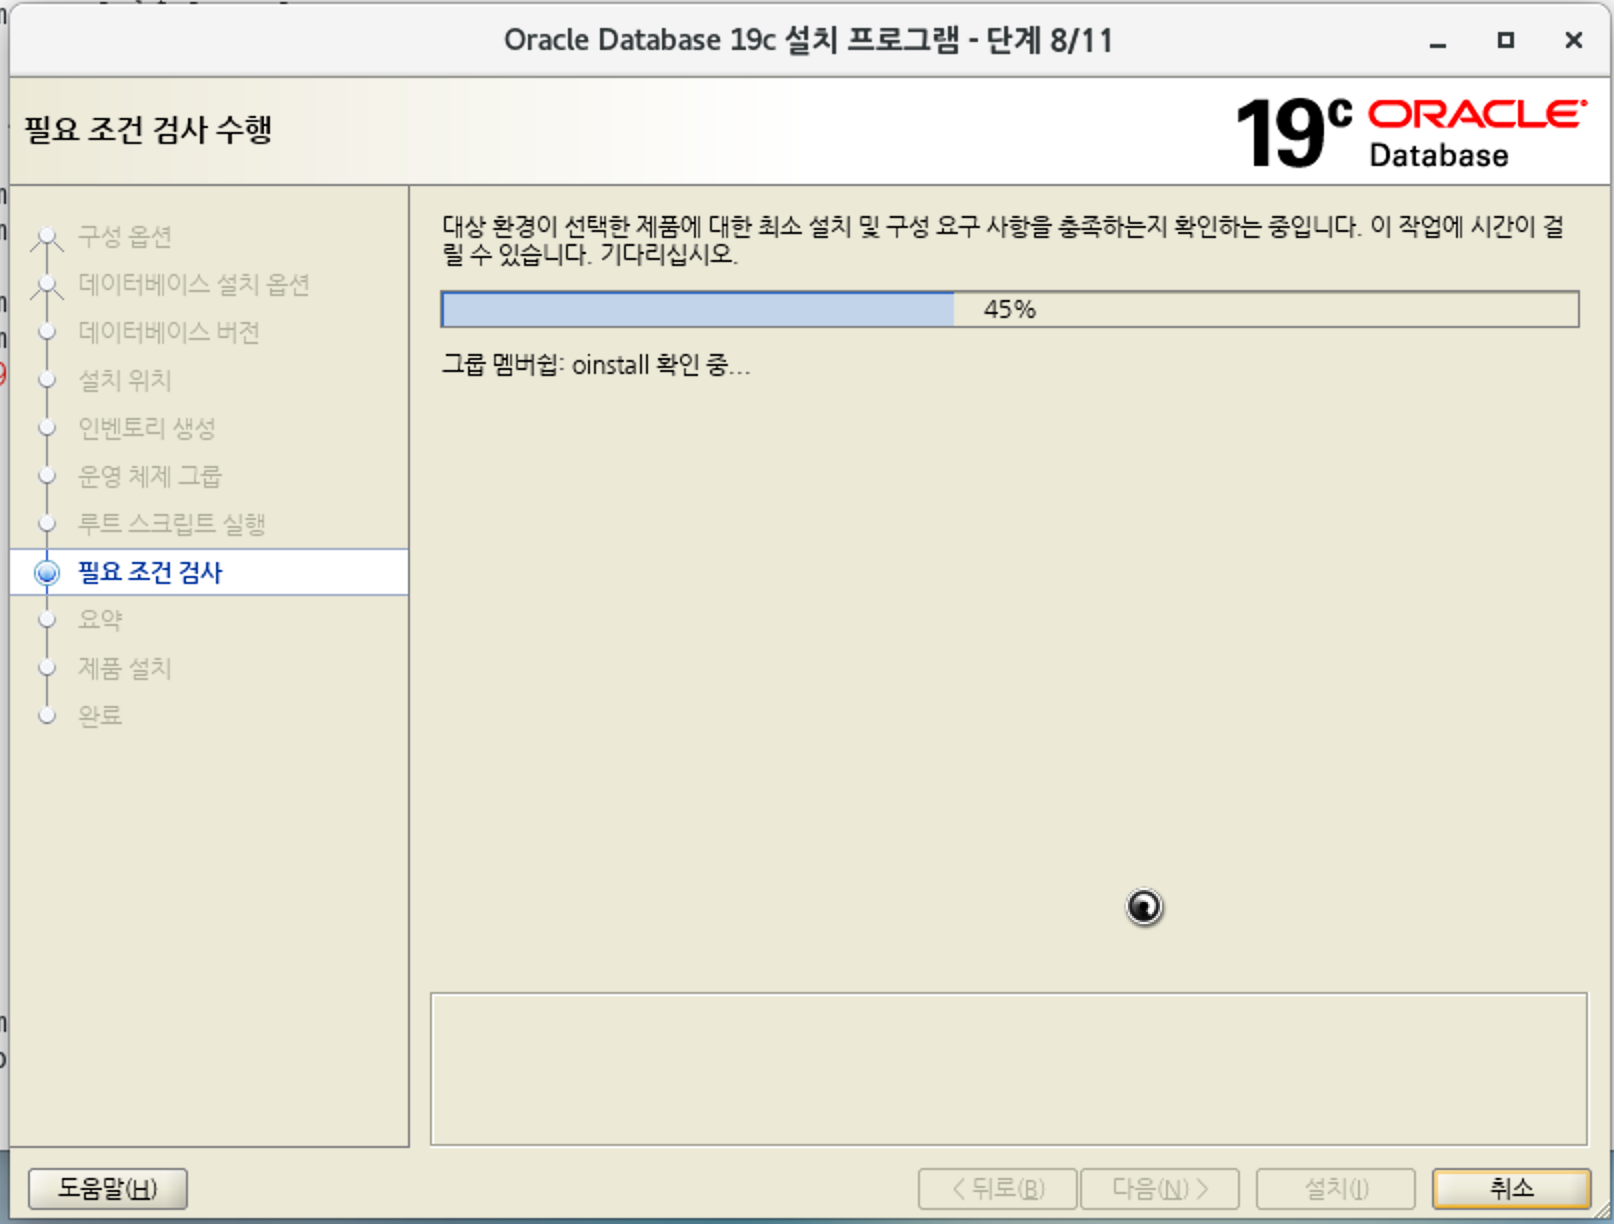
- 시스템 환경 조사.
만약 설치 조건을 만족하지 못했다면 관련 내용을 표시합니다.
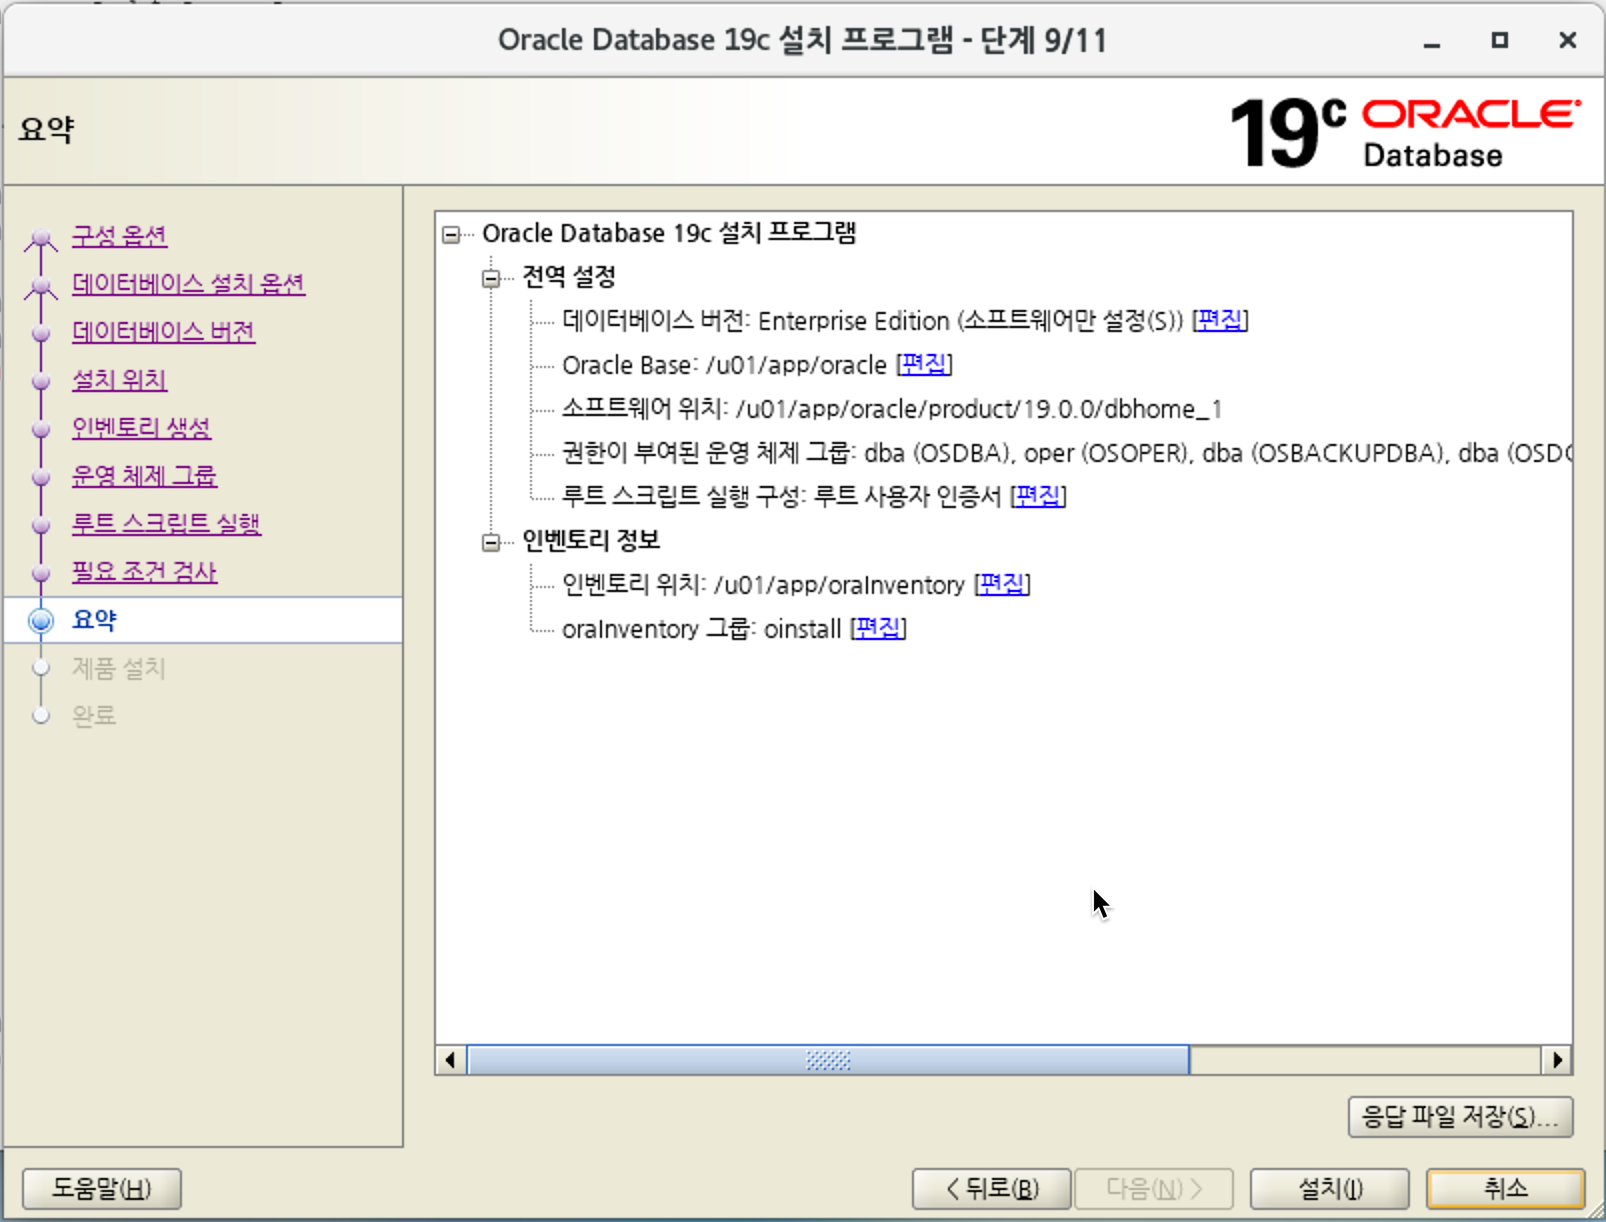
- 설치 요약 화면
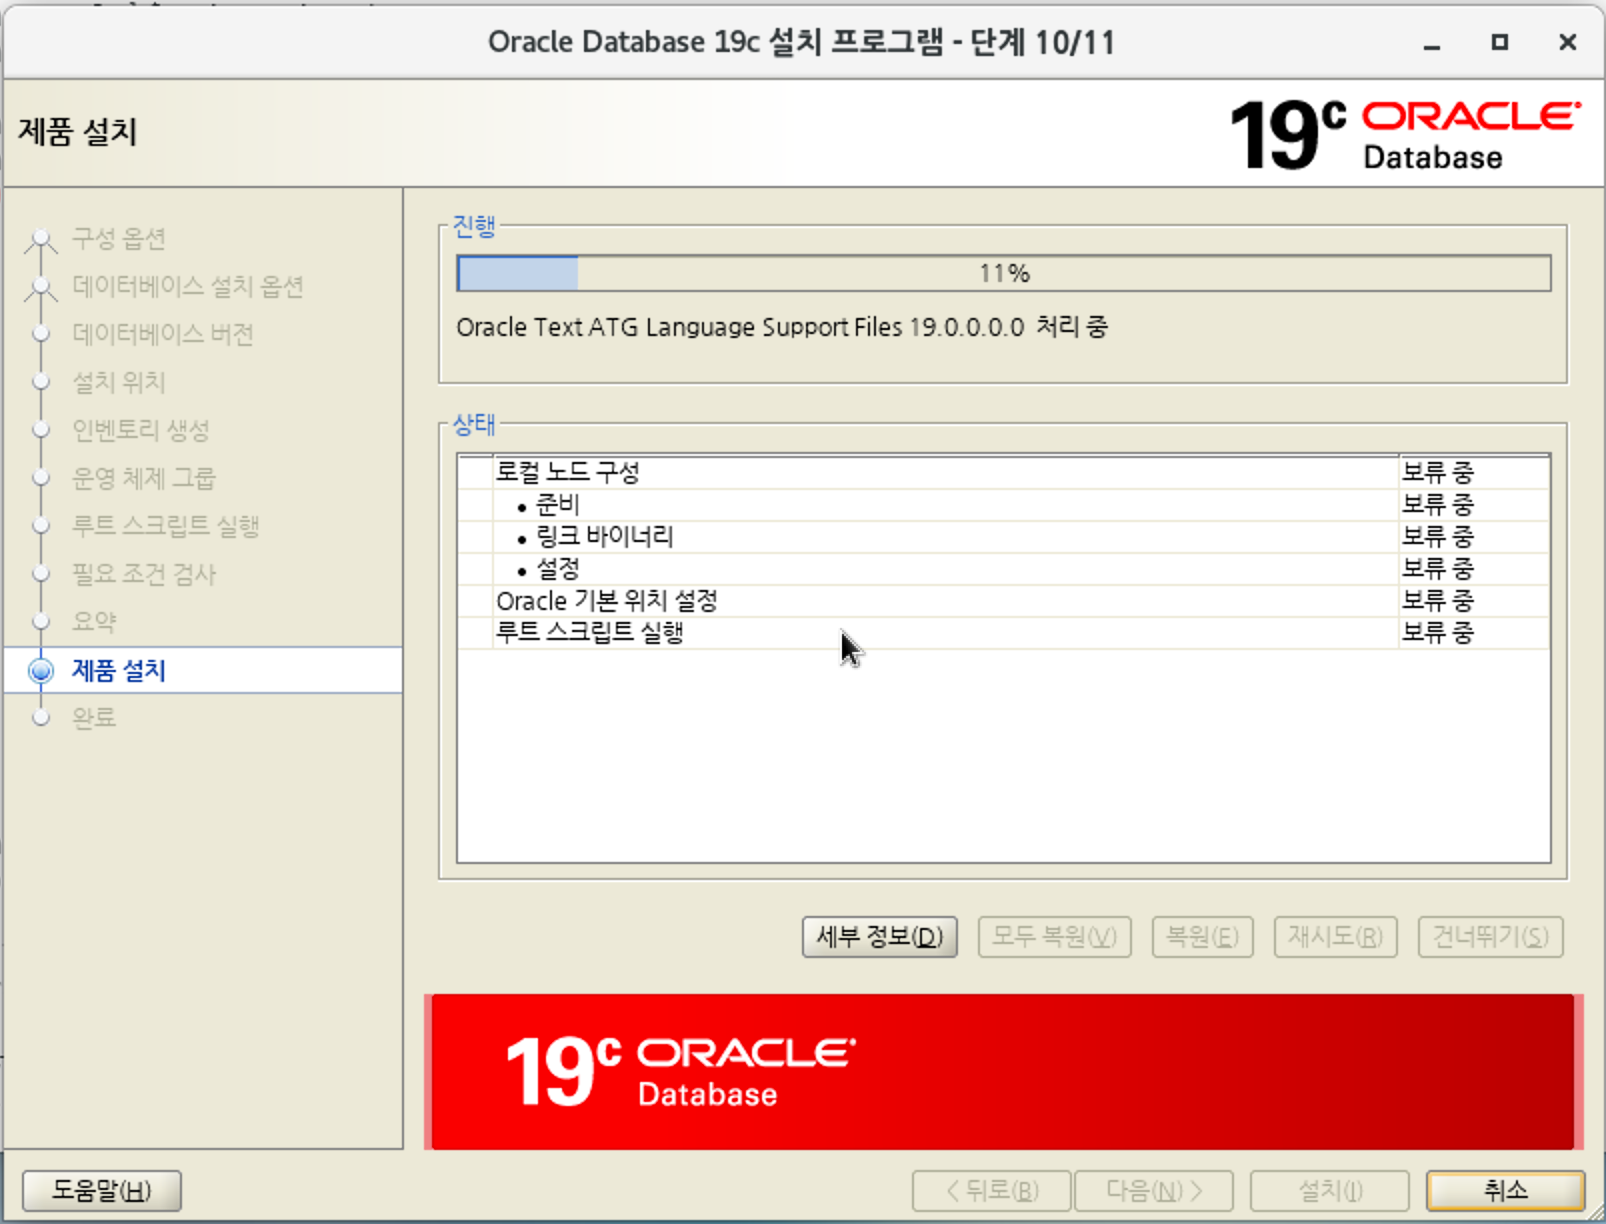
- 오라클 설치 진행.
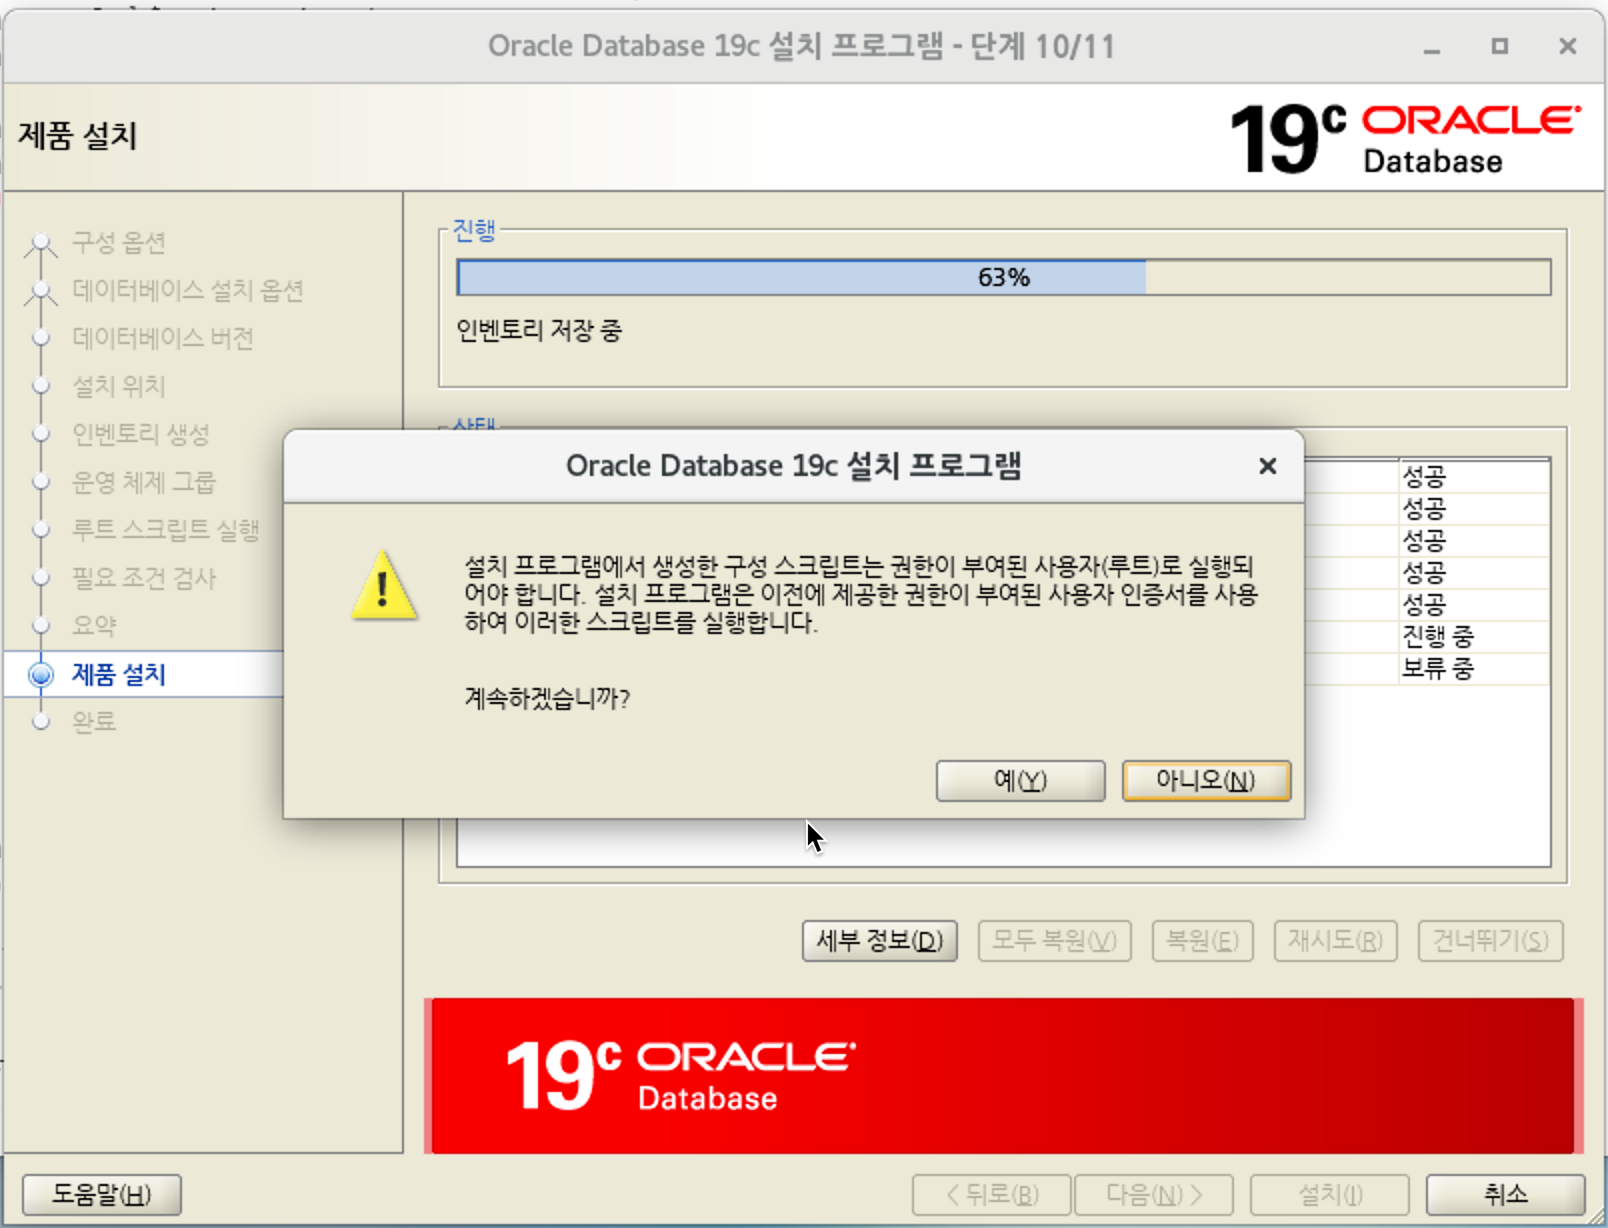
- "예" 를 클릭합니다.
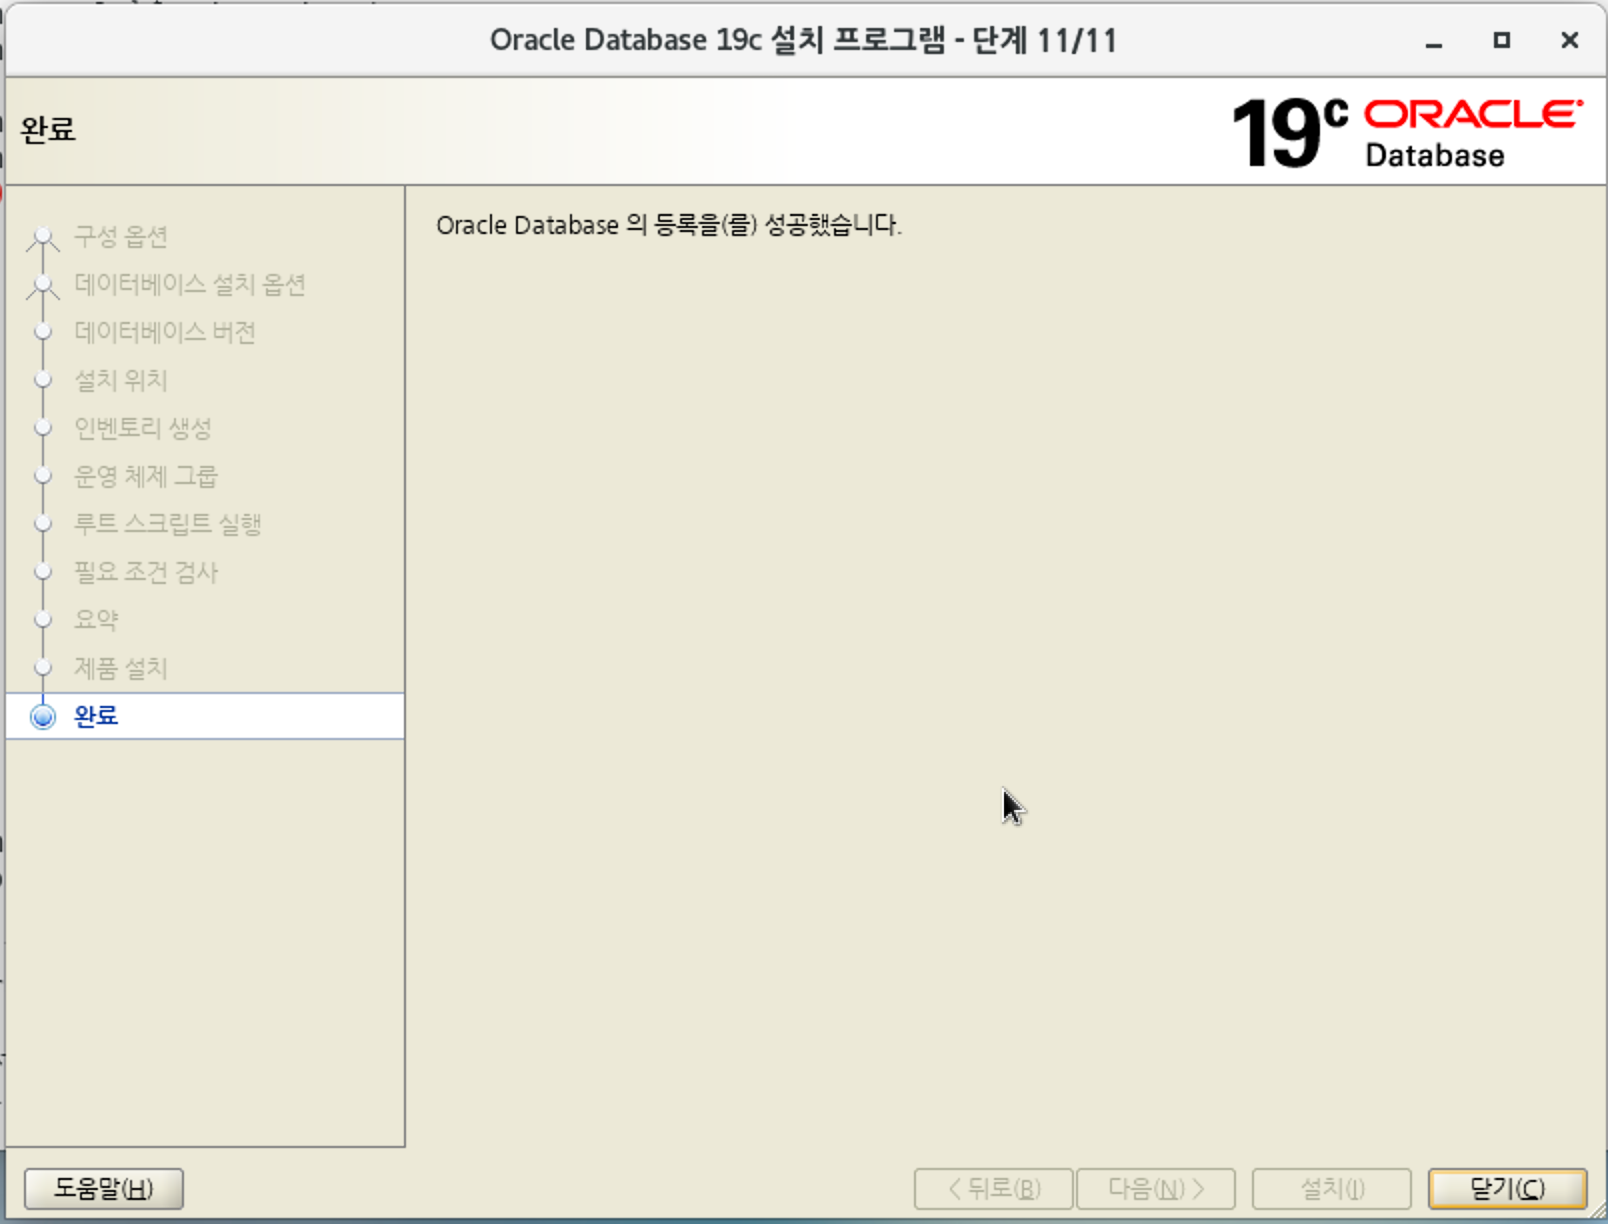
- 설치 완료
• 리스너 설정
- 리스너 설정 명령을 실행합니다.
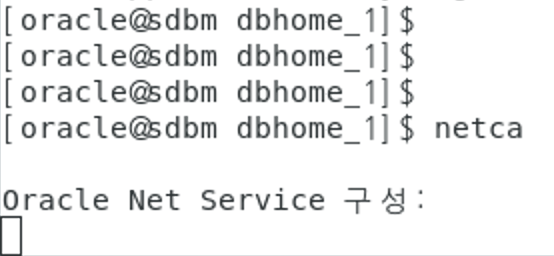
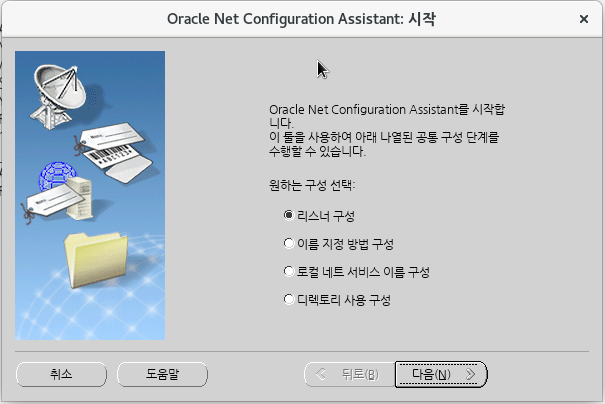
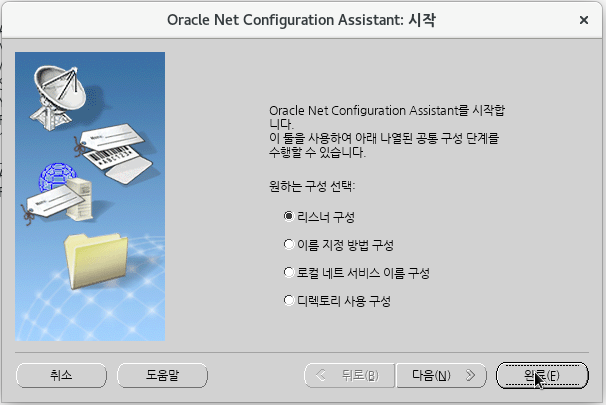
- "리스너 구성"을 선택합니다.
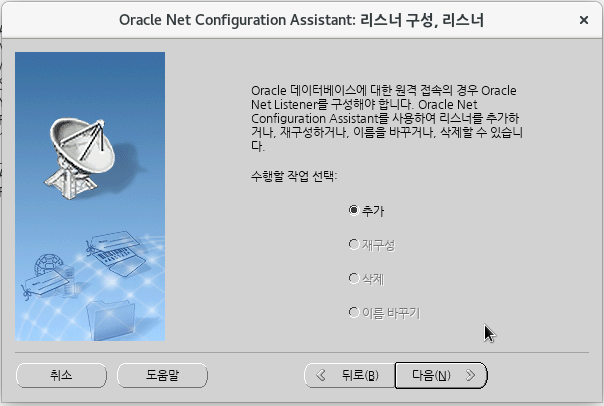
- "추가" 를 선택합니다.
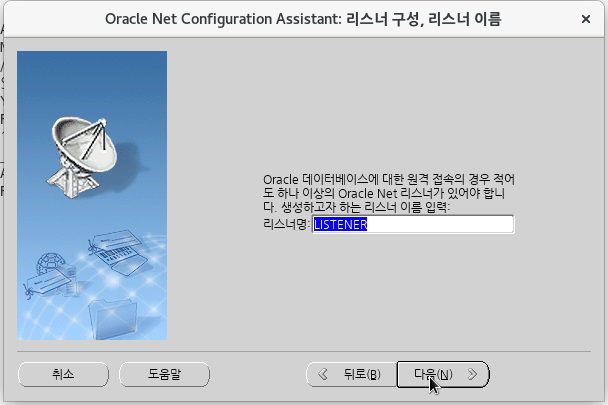
- 리스너명을 입력합니다. 기본값으로 두고 다음을 클릭합니다.
- 사용가능한 프로토콜을 선택합니다.
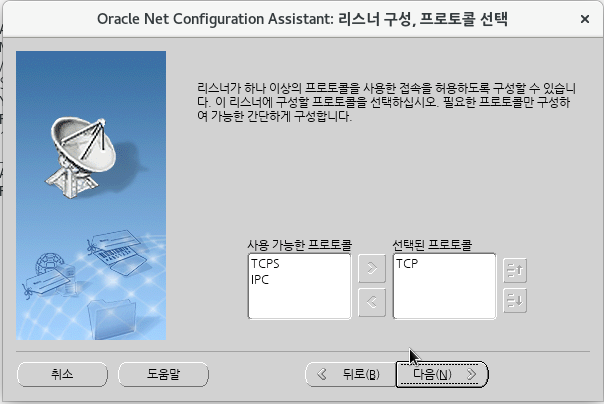
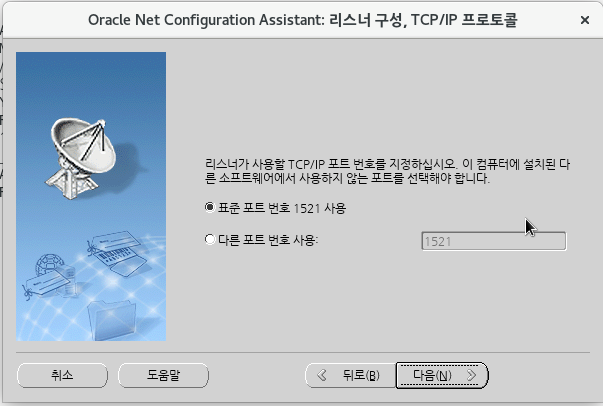
- 표준포트를 선택합니다.
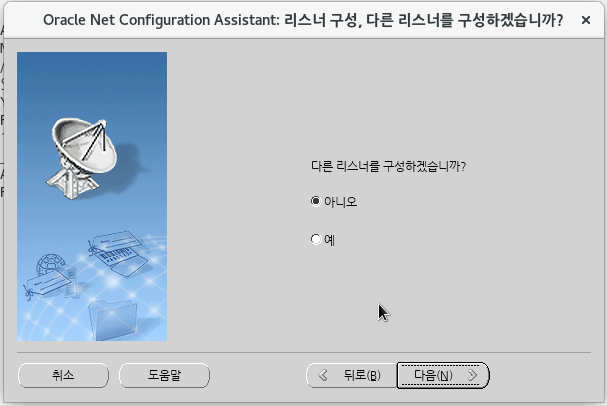
- 다른 리스너 구성은 하지 않습니다.
- 다음 클릭
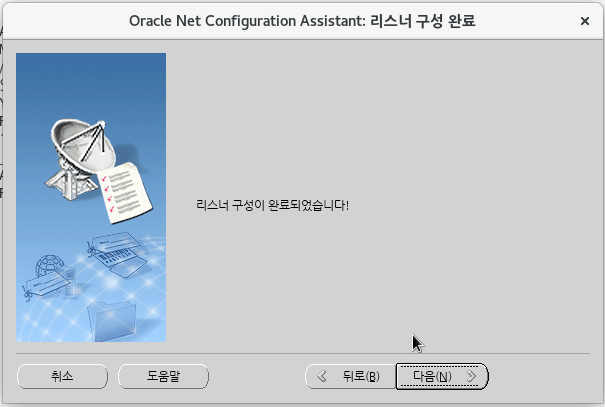
- 완료 클릭
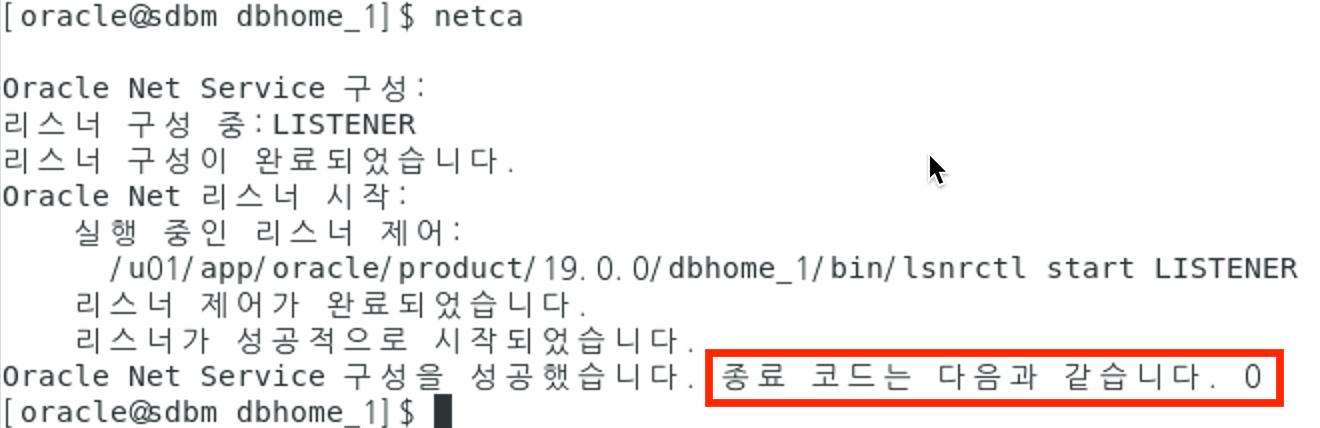
- 종료코드가 0인지 확인합니다.
• 데이터베이스 구성
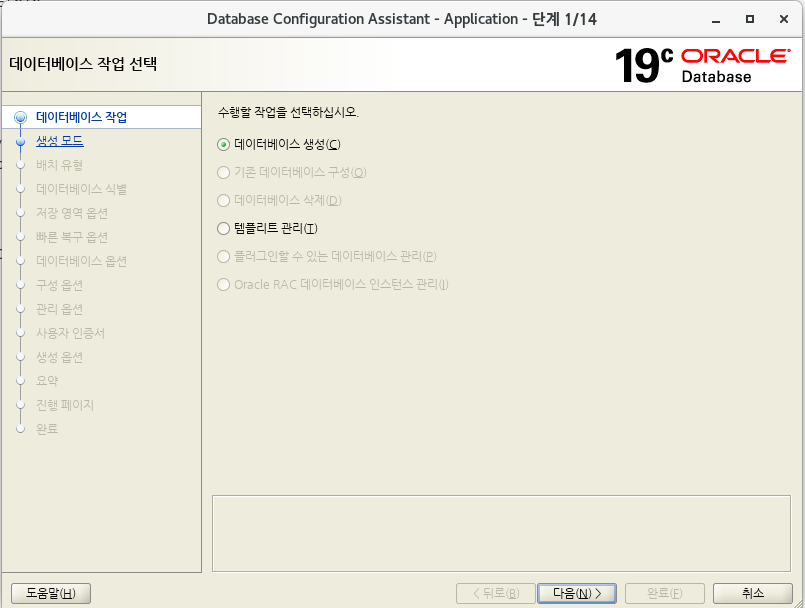
- 데이터베이스 생성 명령어를 실행합니다.

- 데이터베이스 생성을 선택합니다.
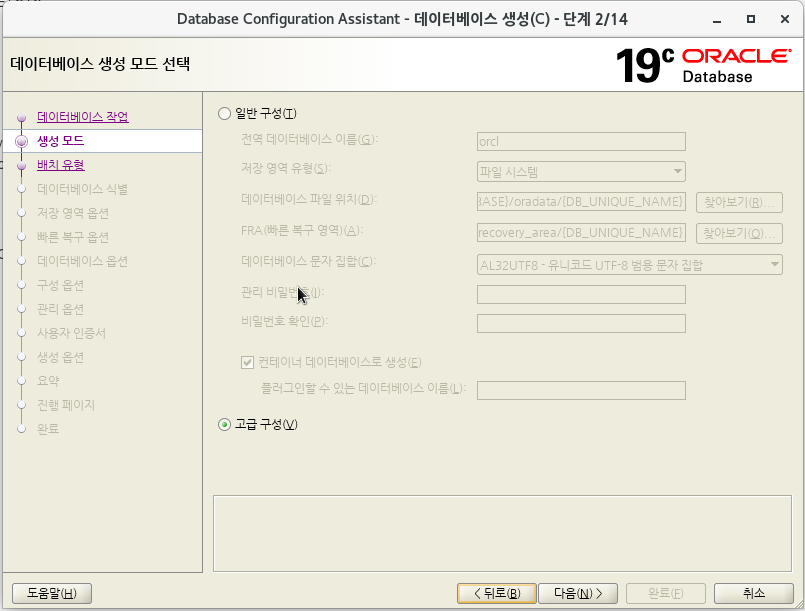
- 고급구성을 선택합니다.
- Oracle 단일 인스턴스 데이터 베이스 선택, 아래 "범용 또는 트랜잭션 처리"를 선택합니다.

- 전역 데이터베이스 이름을 입력합니다.
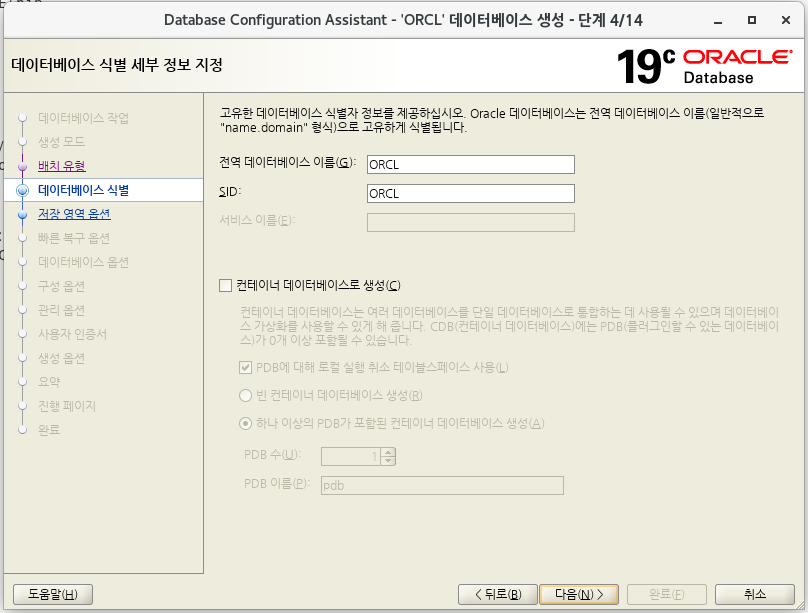
- 데이터베이스 저장 영역 속성에 템플리트 파일 사용을 선택합니다.
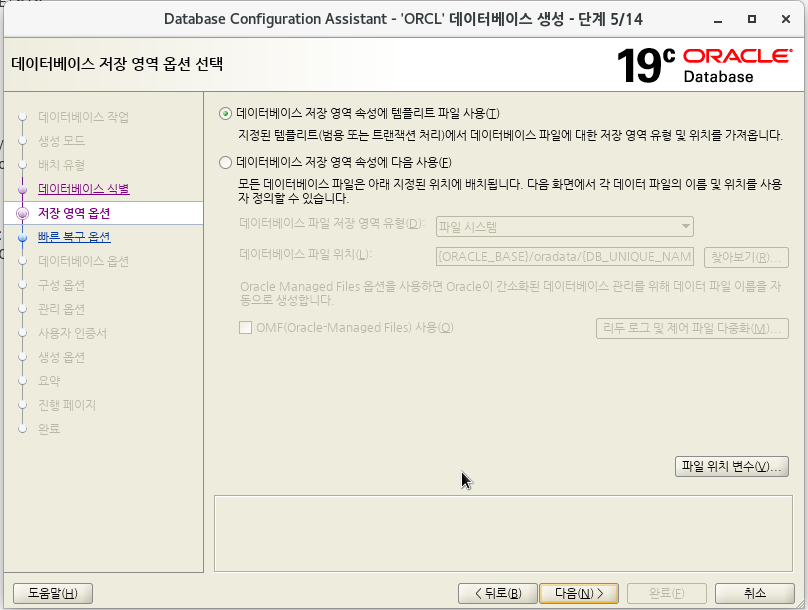
- 빠른 복구 영역 지정을 선택합니다. 다른 항목은 기본값으로 선택합니다.
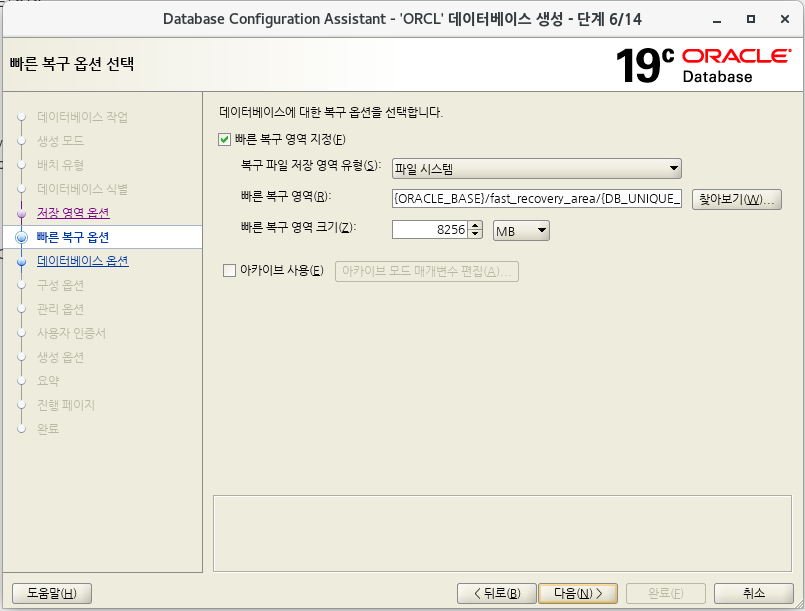
- 리스너를 선택합니다.
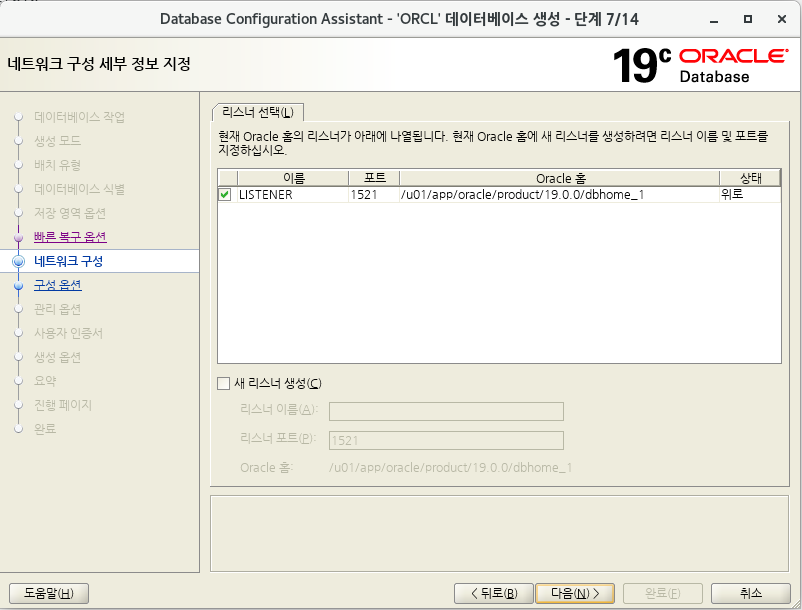
- 모두 체크하지 않습니다.
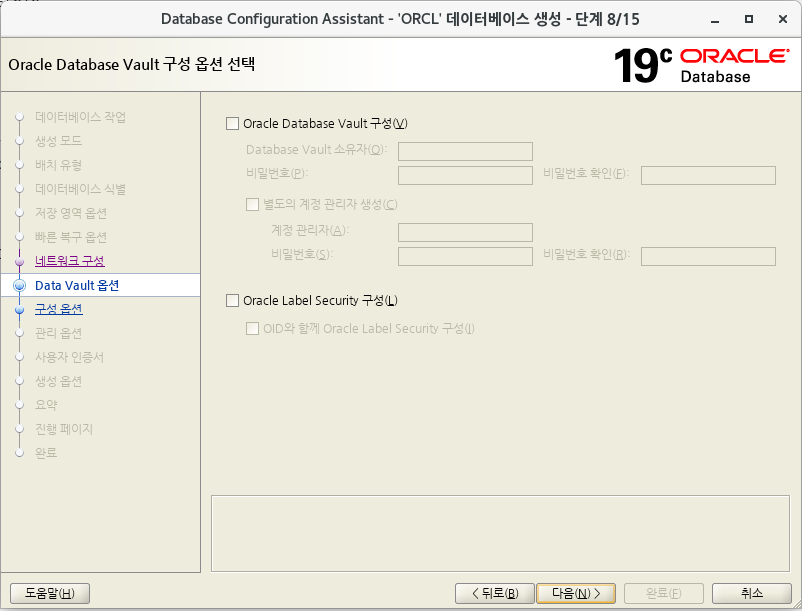
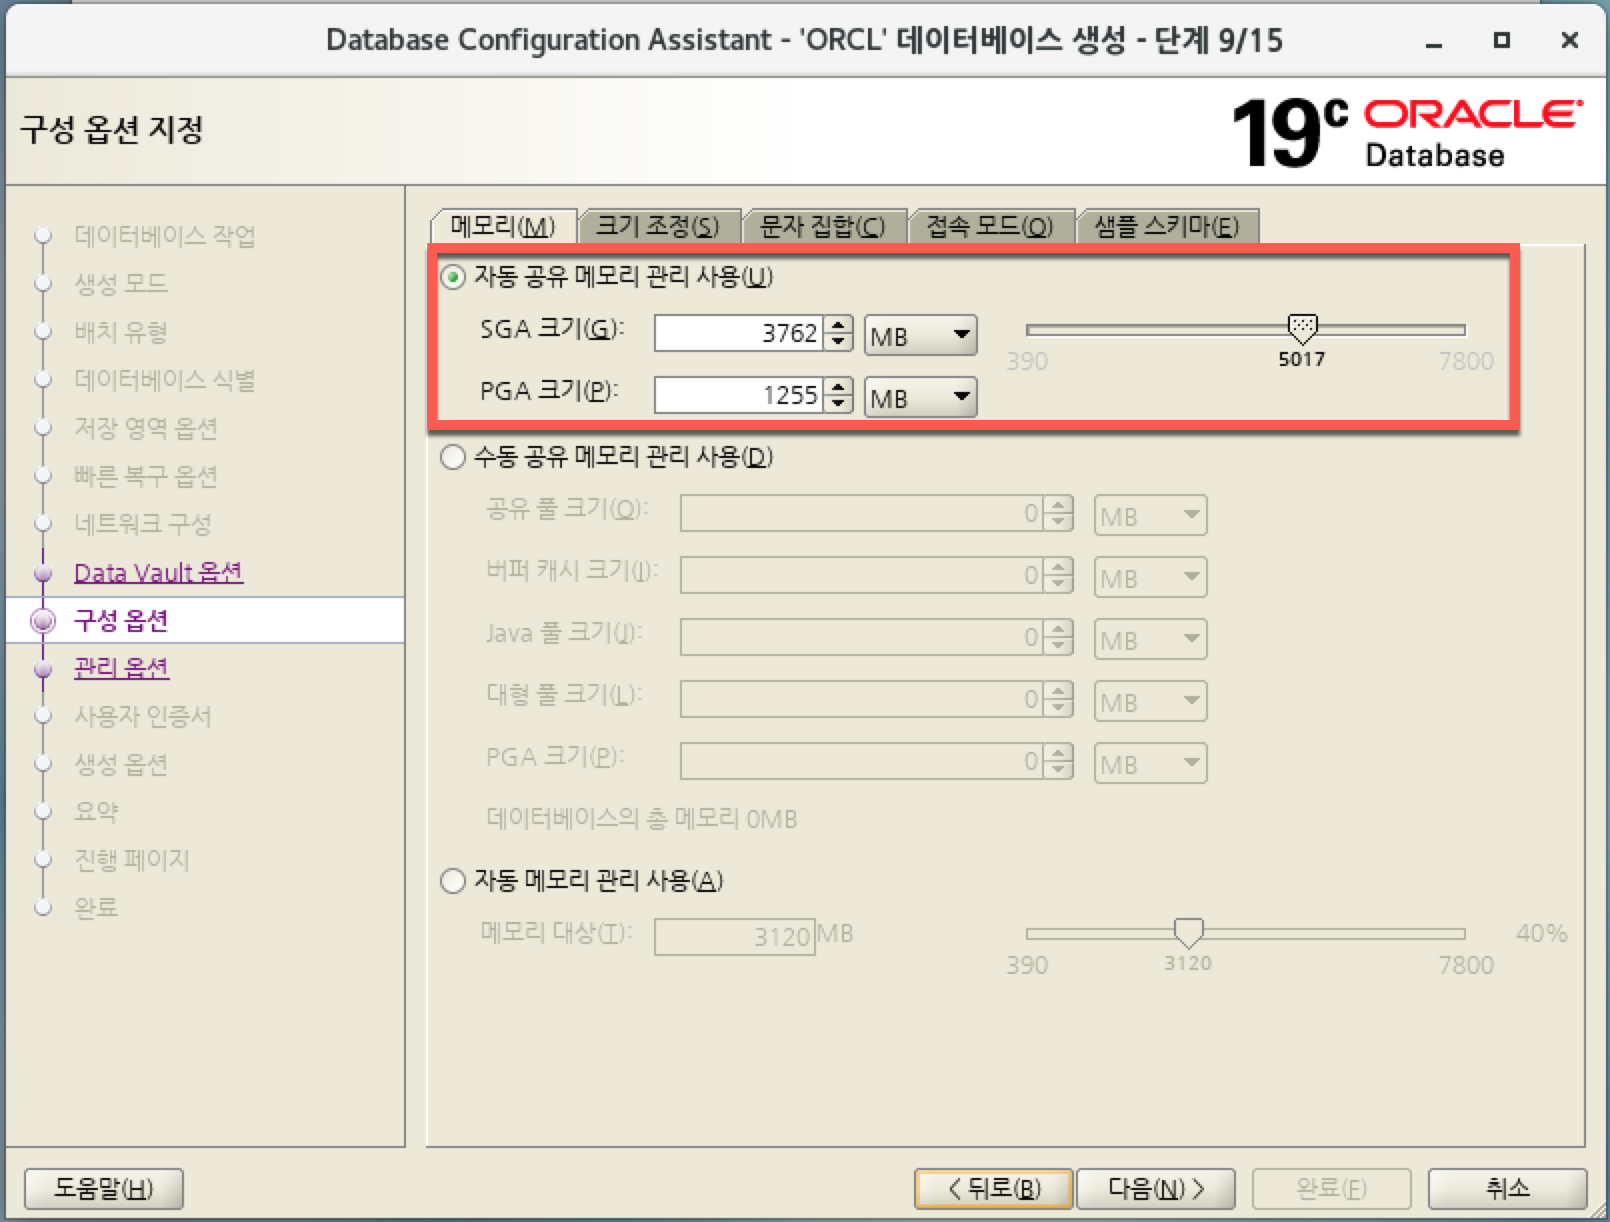
- 자동 공유 메모리 관리사용을 클릭하고 메모리를 설정합니다.
작은 메모리를 가진 서버는 50%정도로 설정하고 만약 사이즈가 크다면 60%정도를 설정합니다.
아래 화면은 8G전체 메모리를 가지고 있을때 60%정도인 5G로 잡았습니다.
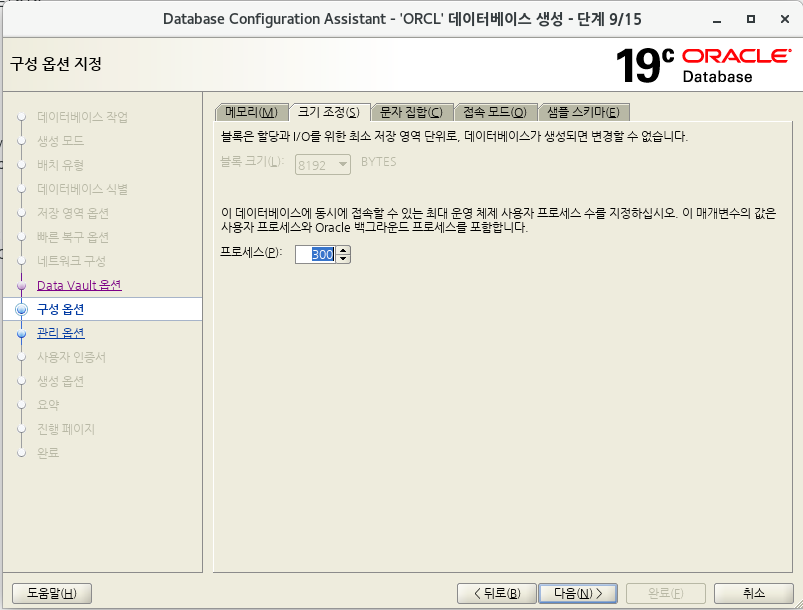
- 프로세스를 기본값(300)으로 두고 다음을 클릭합니다.
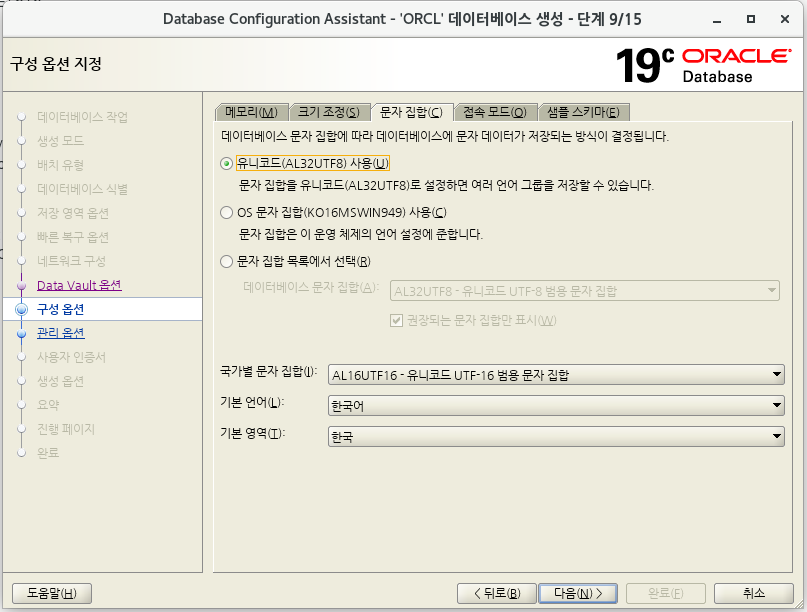
- 유니코드 사용 선택후 다음을 클릭합니다.
- 전용 서버 모드를 선택합니다.
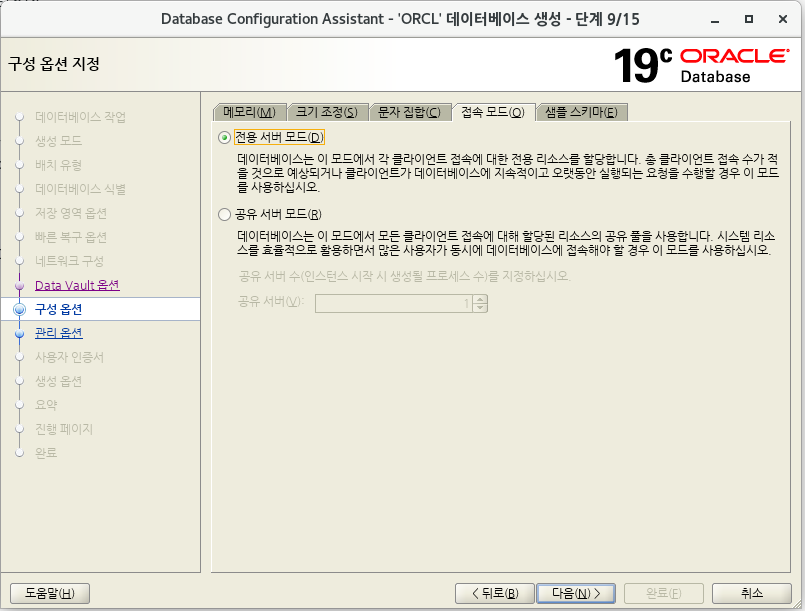
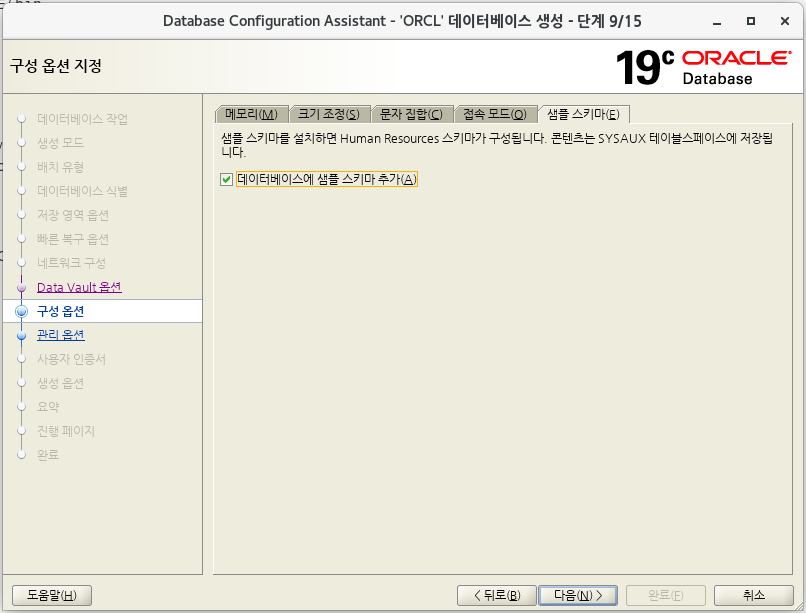
- 데이터베이스 샘플 스키마 추가를 선택합니다.
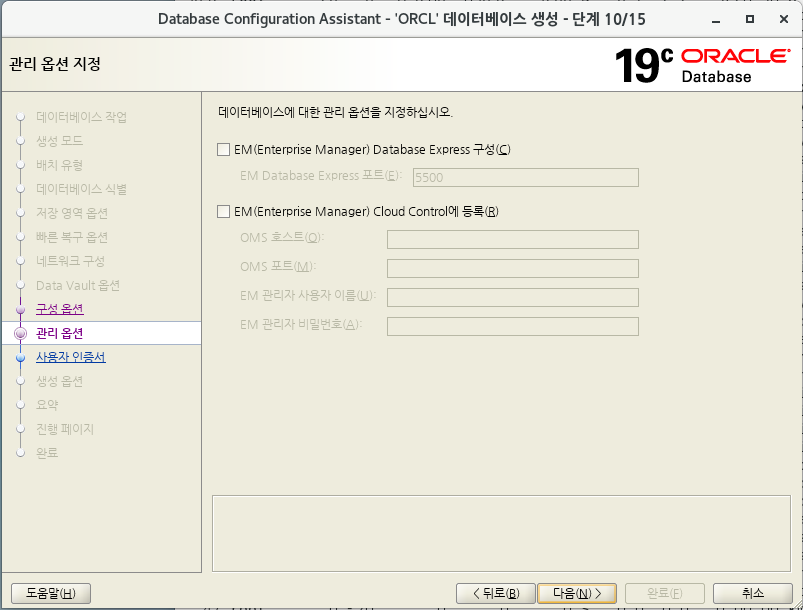
- EM을 사용하고 싶다면 선택합니다.
- 편의를 위해 "모든 계정에 동일한 관리 비밀번호 사용"을 선택합니다.
프로덕션 DB에는 당연히 따로 따로 모두 지정해 주어야 합니다.
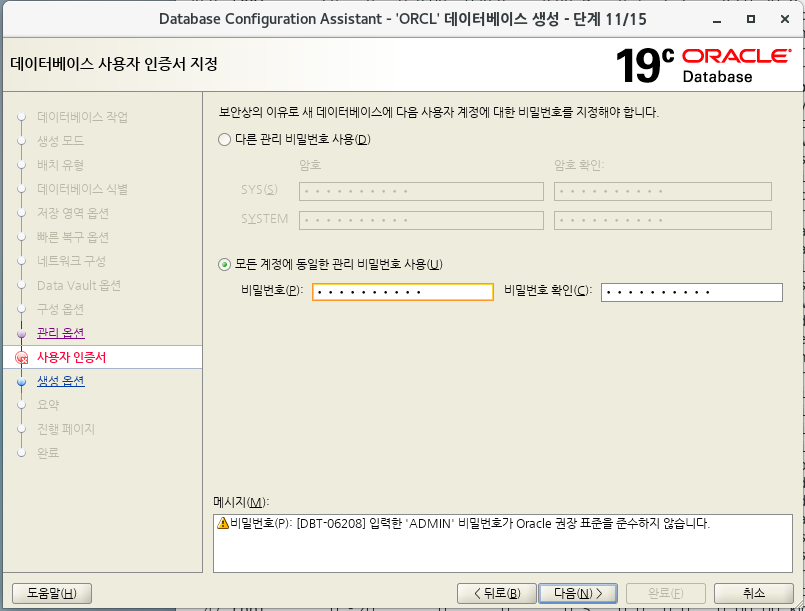
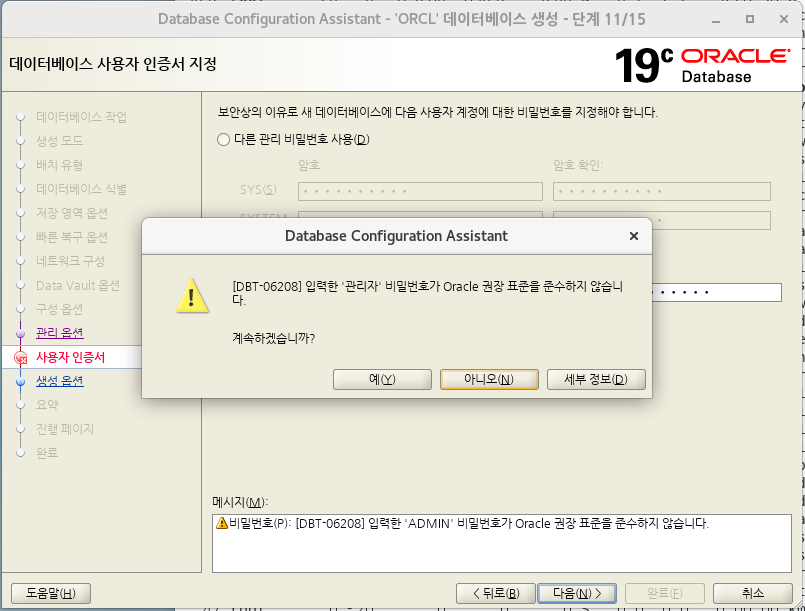
- 암호를 간단히 입력하면 아래와 같은 경고 메세지가 나옵니다. 무시하셔도 됩니다.
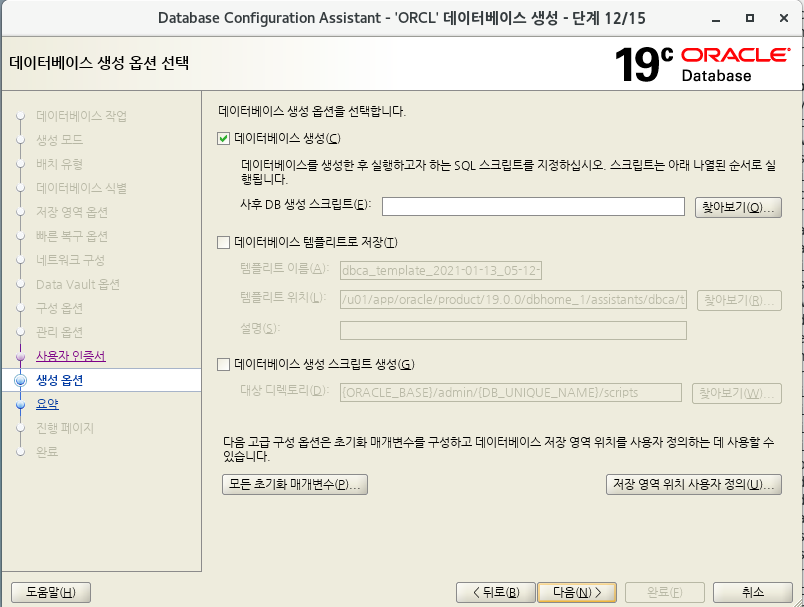
- 데이터베이스 생엉 옵션을 선택하고 다음을 클릭합니다.
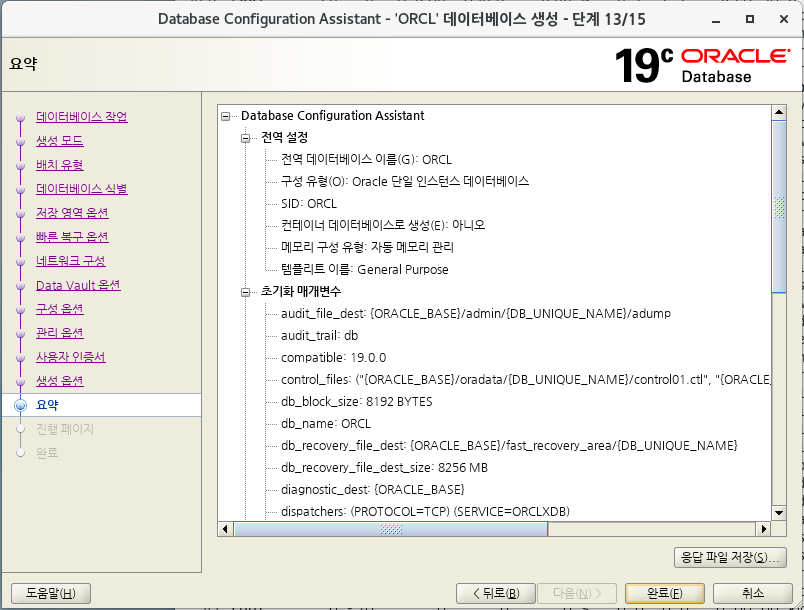
- 설치 요약정보 화면입니다.
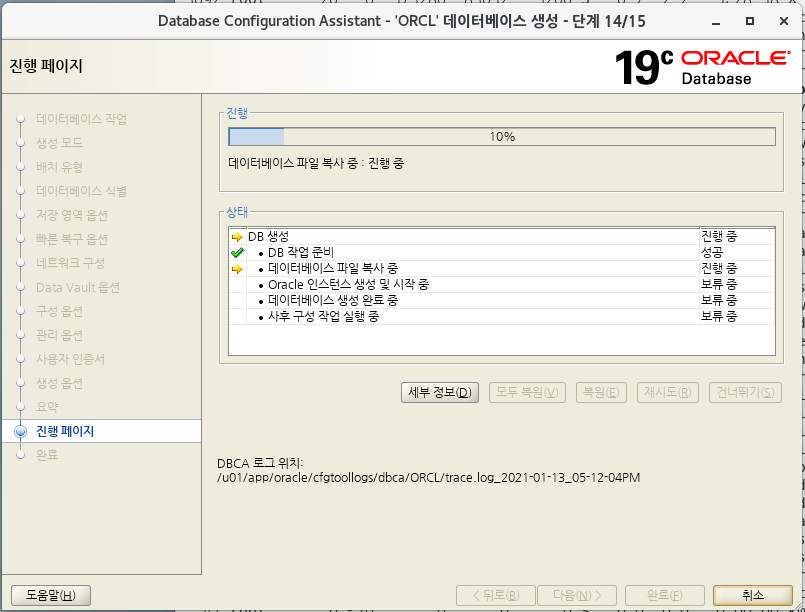
- 설치 진행중입니다.
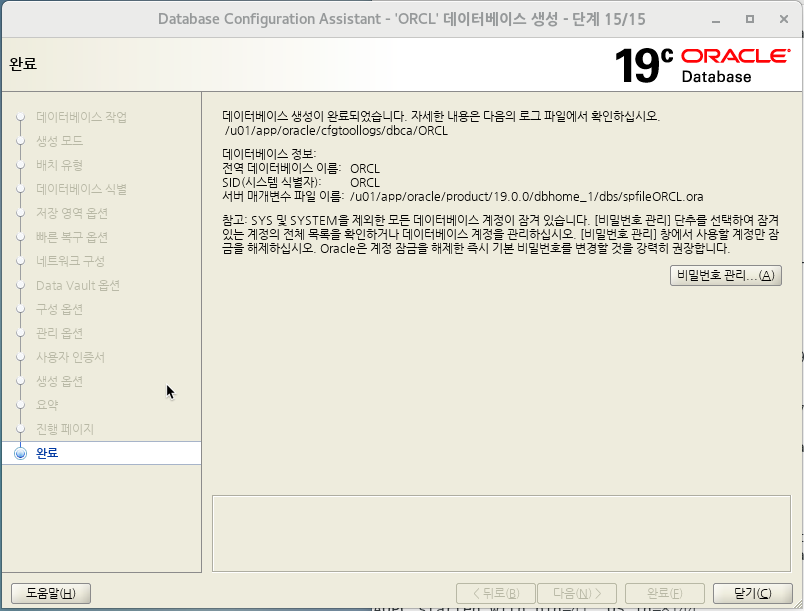
- DB생성 완료화면입니다. 닫기를 클릭합니다.
'Databases > Oracle' 카테고리의 다른 글
| [Oracle] Oracle 19c + CentOS7 사일런트(Silent) 설치 (0) | 2021.01.27 |
|---|---|
| [Oracle] Index Contention (0) | 2020.10.01 |
| [Oracle] Index Contention (0) | 2020.09.07 |